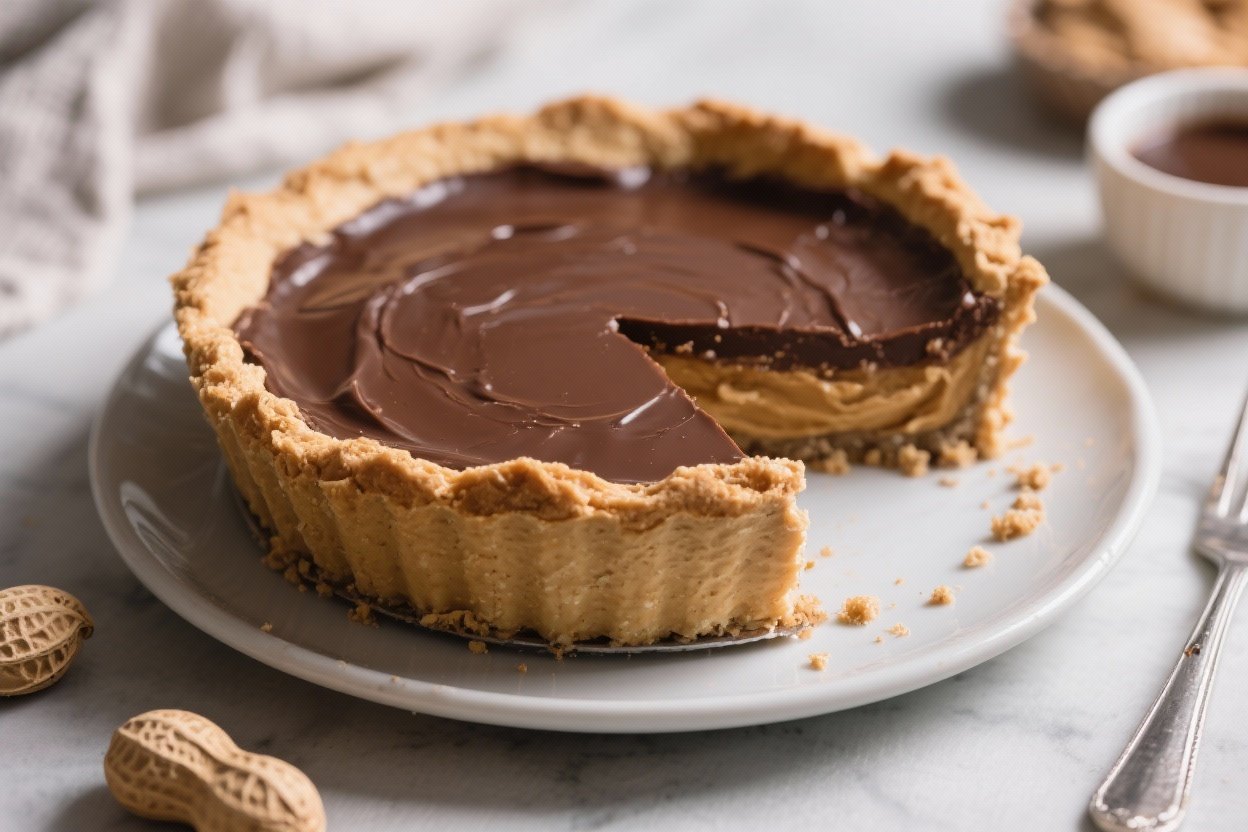
Keto Chocolate Peanut Butter Pie – Rich, Creamy, and Low-Carb
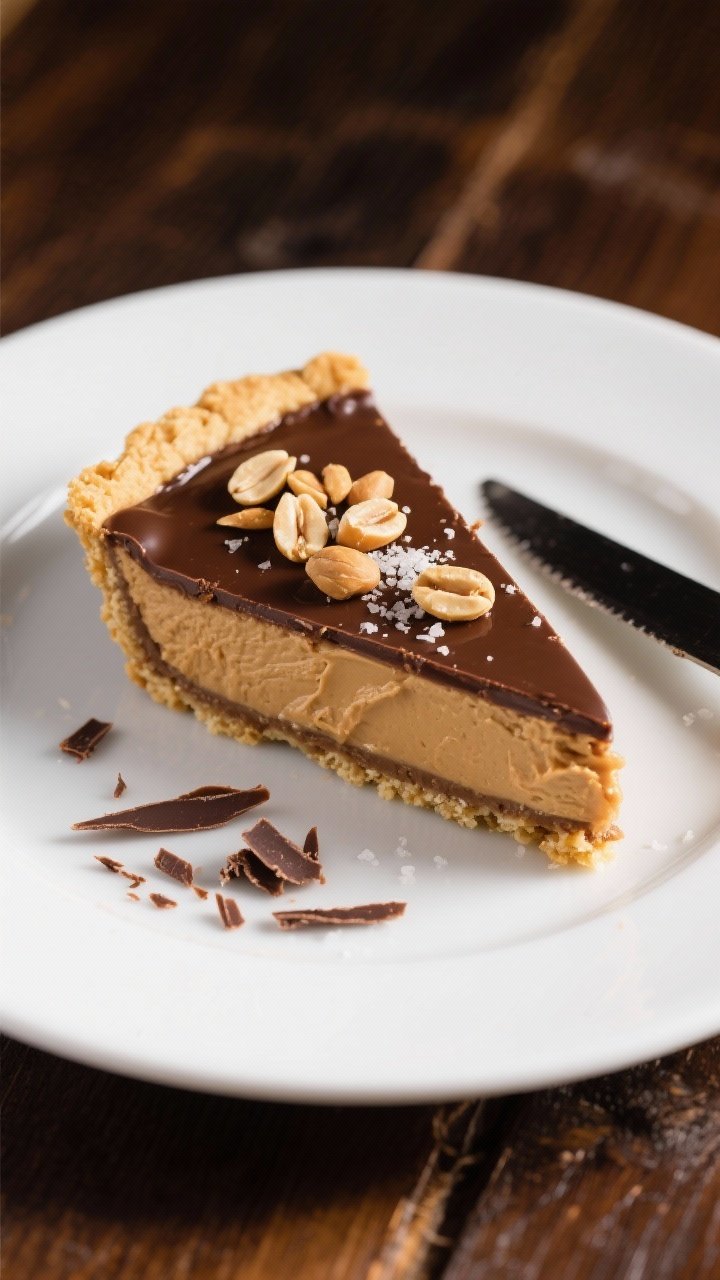
This Keto Chocolate Peanut Butter Pie tastes like a decadent dessert from a bakery, but it fits your low-carb lifestyle. It’s rich, creamy, and indulgent without the sugar crash. The textures are spot-on: a buttery almond crust, a silky peanut butter filling, and a glossy chocolate topping.
It’s simple enough for a weeknight treat and impressive enough for guests. If you love chocolate and peanut butter, this pie will become a go-to.
Overeating is a pattern. This helps you fix that problem. A quick reset for cravings, snacking, and “I’ll start tomorrow” moments.
Built for busy home cooks who want real-life structure. Simple steps that fit meal prep, family dinners, and late-night snack attacks.
Why This Recipe Works
This pie balances flavor and texture without using refined sugar. The almond flour crust brings a nutty, cookie-like base that holds together well and bakes quickly.
The filling gets its creaminess from cream cheese and heavy cream, while powdered sweetener keeps it smooth and clump-free. A dark chocolate ganache topping adds a polished finish and deep cocoa flavor. Each layer sets nicely, so every slice cuts cleanly and looks beautiful.
What You’ll Need
- Almond flour: For the crust; fine blanched works best.
- Unsalted butter: Melted, to bind the crust.
- Granular erythritol or monk fruit blend: For the crust and optional sweetness.
- Cream cheese: Softened; creates a creamy, stable filling.
- Natural peanut butter: Smooth, no added sugar.
Stir well.
- Powdered sweetener: Erythritol/monk fruit or allulose, for a silky filling.
- Vanilla extract: Adds warmth and depth.
- Heavy whipping cream: For light, airy texture in the filling.
- Dark chocolate (85% or sugar-free chips): For the ganache topping.
- Heavy cream (for ganache): Smooths and sets the chocolate layer.
- Sea salt: A pinch brightens the flavors.
- Optional toppings: Chopped roasted peanuts, sugar-free chocolate shavings, or a pinch of flaky salt.
Step-by-Step Instructions
- Prep your pan. Line the bottom of a 9-inch pie dish or springform pan with parchment. Lightly grease the sides.
- Make the crust. In a bowl, mix 2 cups almond flour, 4 tablespoons melted butter, 2–3 tablespoons granular sweetener, and a pinch of salt. It should feel like damp sand and hold when pressed.
- Press and bake. Press the crust evenly into the pan, going slightly up the sides.
Bake at 350°F (175°C) for 10–12 minutes until lightly golden. Cool completely.
- Soften the cream cheese. Let 12 ounces cream cheese sit at room temperature for 20–30 minutes. This prevents lumps.
- Whip the cream. In a cold bowl, whip 1 cup heavy cream to stiff peaks.
Set aside.
- Make the filling base. In a separate bowl, beat softened cream cheese, 3/4 cup natural peanut butter, 1/2–2/3 cup powdered sweetener (to taste), 1 teaspoon vanilla, and a small pinch of salt. Beat until completely smooth and fluffy, 2–3 minutes. Scrape down the bowl.
- Lighten the filling. Gently fold the whipped cream into the peanut butter mixture in two additions.
Keep it light to preserve volume.
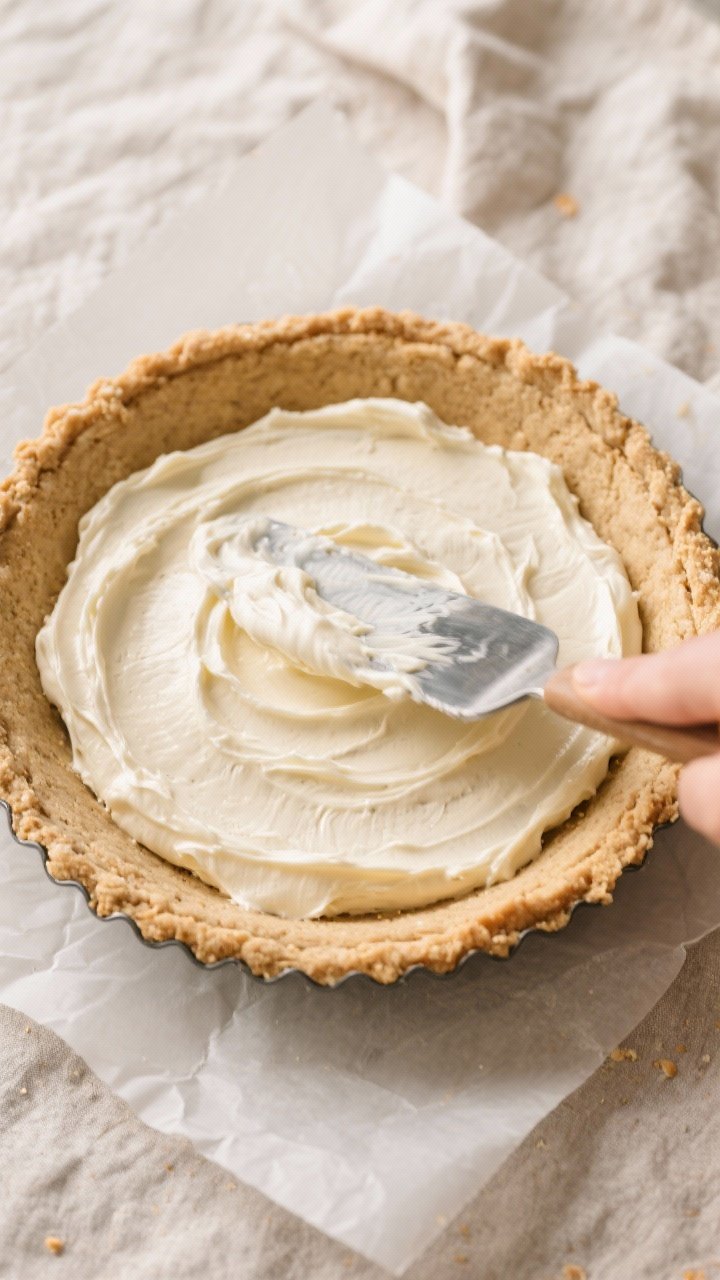
- Fill the crust. Spoon the filling into the cooled crust and smooth the top with an offset spatula. Chill for at least 45–60 minutes to set before topping.
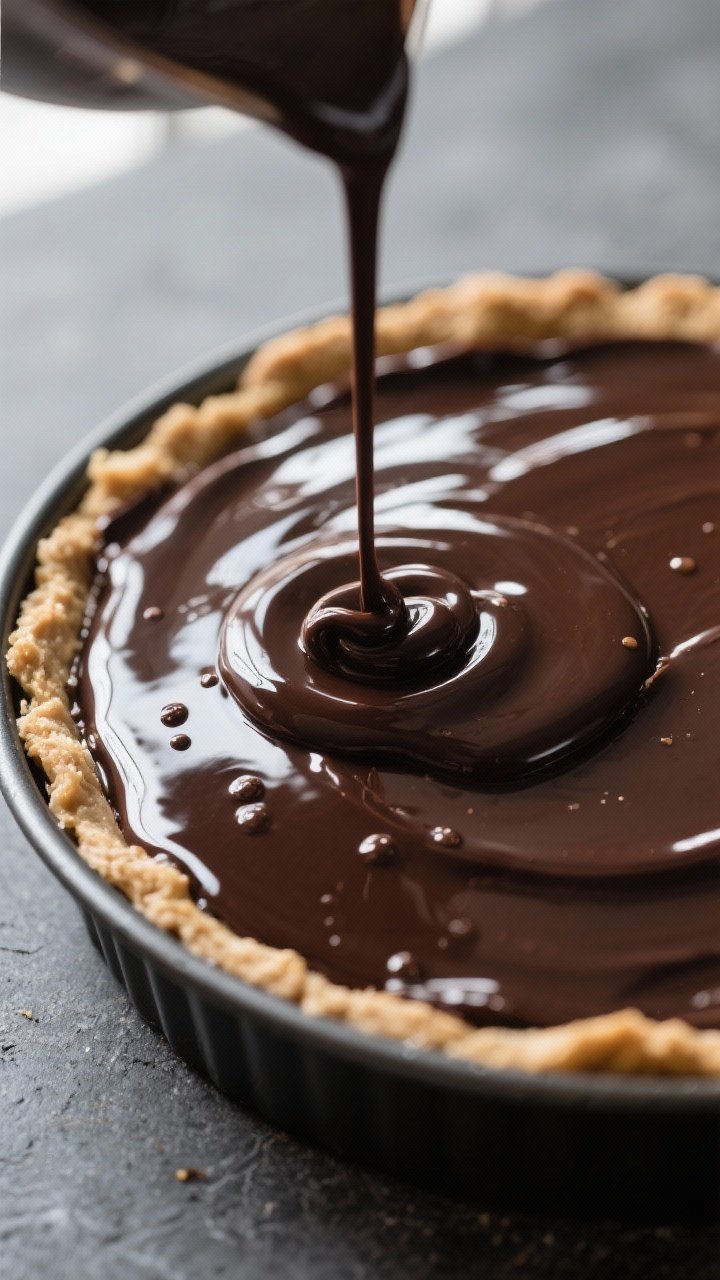
- Make the ganache. Heat 1/2 cup heavy cream until steaming (not boiling). Pour over 4 ounces chopped dark chocolate or sugar-free chips.
Let sit 2 minutes, then stir until glossy. If too thick, add a teaspoon more warm cream; if too thin, add a few extra chocolate chips and stir.
- Top the pie. Pour the ganache over the chilled pie and tilt to spread evenly. Tap gently to release air bubbles.
- Chill to set. Refrigerate 1–2 hours, or until the ganache is firm and the filling is fully set.
For clean slices, chill longer and use a warm knife.
- Garnish and serve. Add chopped peanuts, chocolate shavings, or flaky salt just before serving. Slice and enjoy.
How to Store
Refrigerator: Cover the pie tightly and refrigerate for up to 5 days. The crust stays crisp for the first 2–3 days.
Freezer: Freeze slices on a parchment-lined tray, then wrap individually.
Store up to 2 months. Thaw in the fridge for a few hours before serving.
Avoid moisture: Keep the pie covered to prevent condensation on the ganache.
Benefits of This Recipe
- Low-carb and keto-friendly: Uses almond flour and sugar-free sweeteners to keep carbs down.
- No-bake filling: Only the crust needs a quick bake, and even that can be made no-bake with a tweak.
- Satisfying fats and protein: Peanut butter and cream cheese help you feel full longer.
- Simple ingredients: Everything is easy to find and budget-friendly.
- Make-ahead friendly: Sets beautifully and tastes even better the next day.

What Not to Do
- Don’t use peanut butter with added sugar. It will raise carbs and make the filling too sweet.
- Don’t skip softening the cream cheese. Cold cream cheese leads to lumps you can’t fix later.
- Don’t overheat the chocolate. Boiling cream can seize chocolate. Aim for steaming, not boiling.
- Don’t cut too early. If the pie isn’t fully chilled, the layers will smear and the crust may crumble.
- Don’t pack the crust too thin. A sturdy, even crust supports clean slices.
Alternatives
- No-bake crust: Mix almond flour, melted butter, and sweetener, then press and chill without baking.
It will be softer but still tasty.
- Chocolate crust: Add 2 tablespoons unsweetened cocoa powder to the crust and a bit more sweetener.
- Nut-free option: Use sunflower seed flour instead of almond flour and sunflower seed butter instead of peanut butter. Taste and adjust sweetener.
- Dairy-free: Use dairy-free cream cheese and coconut cream in place of heavy cream. Use dairy-free, sugar-free chocolate for the topping.
- Sweeteners: For the filling, powdered allulose gives the smoothest texture.
If using erythritol blends, make sure it’s powdered to avoid grittiness.
- Flavor twist: Add a teaspoon of espresso powder to the ganache for a mocha note, or swirl in a few tablespoons of sugar-free caramel for a salted caramel vibe.
FAQ
How many carbs are in a slice?
It depends on the brands you use and portion size. Generally, for 12 slices, expect around 5–7g net carbs per slice when using almond flour, natural peanut butter, and sugar-free chocolate. Always calculate with your specific ingredients.
Can I use a different nut butter?
Yes.
Almond butter or cashew butter works, but peanut butter offers the boldest flavor. If your nut butter is runny, reduce the amount slightly or chill the filling longer to set.
My filling is grainy. What happened?
Graininess often comes from granular sweetener.
Use a powdered sweetener and make sure the cream cheese is fully softened. Beat the filling until smooth before folding in whipped cream.
How do I get clean slices?
Chill the pie at least 2 hours. Use a sharp knife warmed under hot water and wiped dry between each cut.
A springform pan also helps with neat edges.
Can I make this ahead of time?
Absolutely. Make it a day in advance and keep it refrigerated. Add garnishes right before serving for the best texture.
What if I don’t have a mixer?
You can use a sturdy whisk, but it takes more effort.
Whip the cream in a cold bowl, and make sure the cream cheese is very soft to mix smoothly by hand.
Is this pie sweet enough for non-keto guests?
Yes, especially if you use a touch more sweetener in the filling and a semi-sweet sugar-free chocolate. Taste and adjust before chilling.
Can I skip the ganache?
Yes. The pie is delicious with just a dusting of cocoa powder or a sprinkle of chopped peanuts.
The ganache adds richness and structure, but it isn’t mandatory.
In Conclusion
This Keto Chocolate Peanut Butter Pie brings classic dessert comfort with a smart, low-carb twist. It’s creamy, chocolatey, and satisfying, with simple steps and pantry-friendly ingredients. Make it for a special occasion or a weeknight treat, and enjoy a slice that feels indulgent without the sugar.
Keep a slice or two in the freezer—you’ll be glad you did.
Printable Recipe Card
Want just the essential recipe details without scrolling through the article? Get our printable recipe card with just the ingredients and instructions.