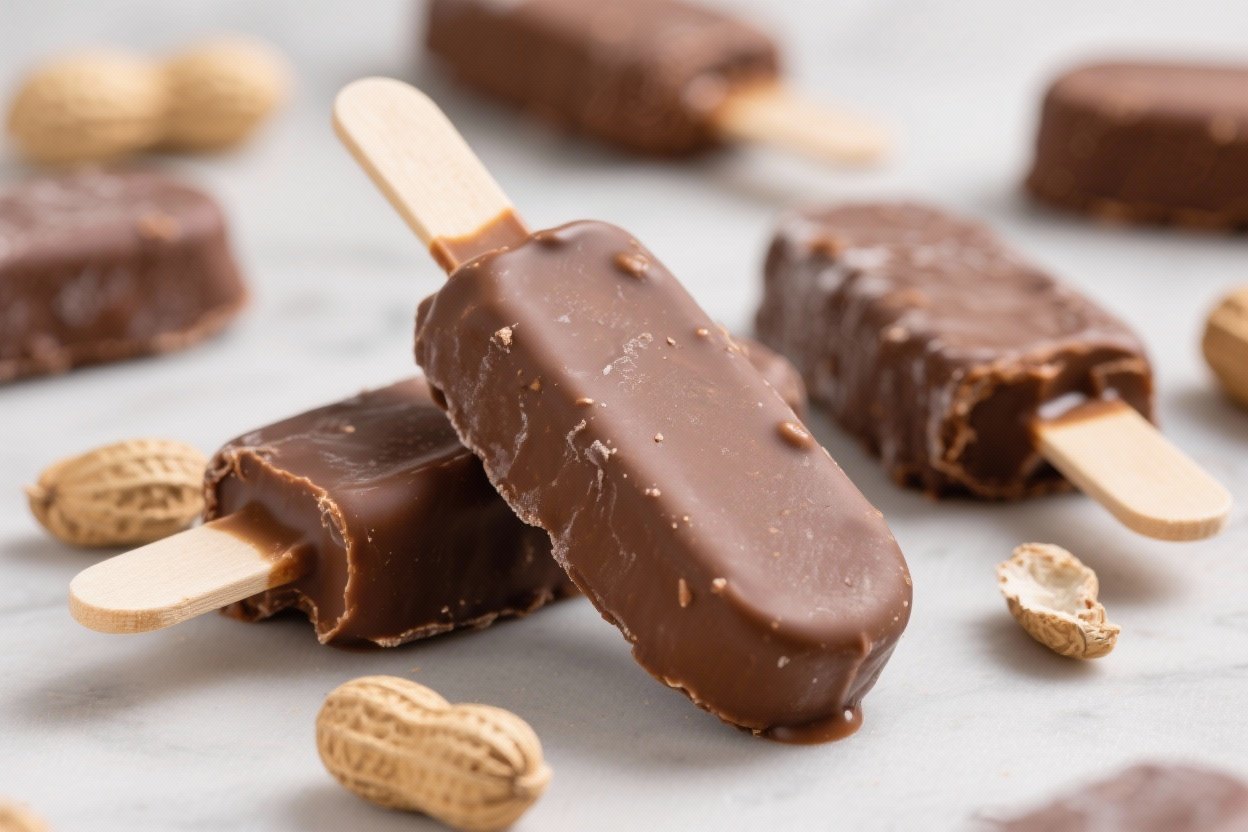
Keto Peanut Butter Chocolate Ice Cream Bars – Creamy, Crunchy, and Low-Carb
These Keto Peanut Butter Chocolate Ice Cream Bars are the kind of dessert you look forward to all day. They’ve got a creamy peanut butter center, a crisp chocolate shell, and just enough sweetness to satisfy a craving without knocking you out of ketosis. You don’t need an ice cream maker, and the ingredients are simple.
They’re freezer-friendly, easy to portion, and perfect for keeping on hand when you want something cold and indulgent.
Ingredients
Method
- Prep the pan: Line an 8x8-inch pan with parchment, leaving overhang for easy lifting. If using silicone bar molds, no lining needed.
- Whip the cream: In a clean bowl, whip the heavy cream to soft peaks. Set aside.
- Beat the base: In a separate large bowl, beat cream cheese until smooth. Add peanut butter, powdered sweetener, vanilla, and a pinch of salt. Beat until creamy and well combined.
- Fold together: Gently fold the whipped cream into the peanut butter mixture until smooth and fluffy. Taste and adjust sweetness if needed.
- Spread and set: Spread the mixture evenly in the prepared pan. If using crushed peanuts, sprinkle over the top and gently press in. Freeze for 3–4 hours, or until very firm.
- Portion the bars: Lift the slab out using the parchment. Cut into 12–16 bars, depending on your preferred size. Return the bars to the freezer while you prepare the chocolate.
- Melt the chocolate: In a microwave-safe bowl, combine sugar-free chocolate chips and coconut oil. Microwave in 20–30 second bursts, stirring between each, until smooth and glossy. Let it cool for 2–3 minutes so it thickens slightly.
- Coat the bars: Working with a few bars at a time, dip each bar into the melted chocolate or spoon chocolate over the top to coat. Place on a parchment-lined sheet. If adding flaky salt, sprinkle a pinch on each while the chocolate is still wet.
- Set and store: Freeze the coated bars for 20–30 minutes until the shell is firm. Transfer to an airtight container for long-term storage.
Overeating is a pattern. This helps you fix that problem. A quick reset for cravings, snacking, and “I’ll start tomorrow” moments.
Built for busy home cooks who want real-life structure. Simple steps that fit meal prep, family dinners, and late-night snack attacks.
What Makes This Recipe So Good

- No churn needed: The filling whips up in minutes with just a mixer and a bowl.
- Truly low-carb: Made with sugar-free sweetener and keto-friendly chocolate.
- Balanced texture: Creamy center, crisp chocolate shell, optional crunchy peanut swirls.
- Meal-prep friendly: Make a batch, freeze, and enjoy all week.
- Satisfying fats: Peanut butter, cream, and coconut oil keep you full and happy.
Ingredients
- For the peanut butter ice cream layer:
- 1 cup natural peanut butter (unsweetened, no added sugar)
- 8 oz cream cheese, softened
- 1 cup heavy whipping cream
- 1/2 cup powdered erythritol or allulose (adjust to taste)
- 1 tsp vanilla extract
- Pinch of fine sea salt
- For the chocolate shell:
- 1 1/2 cups sugar-free chocolate chips (dark or milk-style, keto-friendly)
- 2 tbsp coconut oil
- Optional mix-ins and toppings:
- 1/4 cup crushed roasted peanuts (unsalted or lightly salted)
- Flaky sea salt, for finishing
- Equipment:
- 8×8-inch pan or silicone bar molds
- Parchment paper
- Hand mixer or stand mixer
Step-by-Step Instructions

- Prep the pan: Line an 8×8-inch pan with parchment, leaving overhang for easy lifting. If using silicone bar molds, no lining needed.
- Whip the cream: In a clean bowl, whip the heavy cream to soft peaks. Set aside.
- Beat the base: In a separate large bowl, beat cream cheese until smooth.
Add peanut butter, powdered sweetener, vanilla, and a pinch of salt. Beat until creamy and well combined.
- Fold together: Gently fold the whipped cream into the peanut butter mixture until smooth and fluffy. Taste and adjust sweetness if needed.
- Spread and set: Spread the mixture evenly in the prepared pan.
If using crushed peanuts, sprinkle over the top and gently press in. Freeze for 3–4 hours, or until very firm.
- Portion the bars: Lift the slab out using the parchment. Cut into 12–16 bars, depending on your preferred size.
Return the bars to the freezer while you prepare the chocolate.
- Melt the chocolate: In a microwave-safe bowl, combine sugar-free chocolate chips and coconut oil. Microwave in 20–30 second bursts, stirring between each, until smooth and glossy. Let it cool for 2–3 minutes so it thickens slightly.
- Coat the bars: Working with a few bars at a time, dip each bar into the melted chocolate or spoon chocolate over the top to coat.
Place on a parchment-lined sheet. If adding flaky salt, sprinkle a pinch on each while the chocolate is still wet.
- Set and store: Freeze the coated bars for 20–30 minutes until the shell is firm. Transfer to an airtight container for long-term storage.
Storage Instructions
- Freezer: Store in an airtight container for up to 1 month.
Separate layers with parchment to prevent sticking.
- Serving: Let sit at room temperature for 5–8 minutes before eating for the best creamy texture.
- On the go: If packing in a lunch or cooler, wrap individually and include an ice pack. They soften quickly in warm weather.

Health Benefits
- Low-carb and keto-friendly: Made without sugar, keeping carbs in check while satisfying a dessert craving.
- Healthy fats: Peanut butter, cream, and coconut oil provide fats that support satiety and steady energy.
- Protein boost: Peanut butter adds a modest amount of protein to help balance the macros.
- Customizable sweetness: Erythritol or allulose lets you control the flavor without blood sugar spikes.
What Not to Do
- Don’t use regular chocolate chips: They’ll add a lot of sugar and bump carbs way up.
- Don’t skip the salt: A pinch balances sweetness and deepens peanut flavor.
- Don’t rush the freeze: If the filling isn’t fully firm, the bars will fall apart during coating.
- Don’t overheat the chocolate: Burnt chocolate becomes grainy and won’t coat smoothly.
- Don’t choose sweetened peanut butter: Check the label for added sugars and fillers.
Recipe Variations
- Almond butter bars: Swap peanut butter for almond butter and add a hint of almond extract.
- Peanut butter swirl: Warm 2 tablespoons peanut butter and swirl it into the pan before freezing.
- Crunch layer: Press a thin layer of crushed peanuts or keto granola into the bottom of the pan for texture.
- Chocolate peanut butter cups: Use silicone muffin cups and pour a thin layer of chocolate, freeze, then add filling and top with more chocolate.
- Dairy-free option: Replace cream cheese with full-fat coconut cream cheese substitute and heavy cream with coconut cream; flavor with extra vanilla.
- Mocha twist: Stir 1–2 teaspoons instant espresso into the filling for a coffee kick.
FAQ
Can I use a different sweetener?
Yes. Powdered erythritol, allulose, or a blend works best for a smooth texture.
Granular sweeteners can feel gritty unless dissolved first. Start with less, taste, and adjust.
Do I need an ice cream maker?
No. This is a no-churn recipe.
Whipping the cream and folding it into the peanut butter mixture gives you that creamy, ice-cream-like texture.
What’s the best peanut butter to use?
Choose natural peanut butter with just peanuts and salt. Avoid brands with added sugar or hydrogenated oils. Stir well before measuring to avoid oily or overly thick spots.
How do I prevent the chocolate shell from cracking off?
Let the melted chocolate cool slightly so it’s thicker, and coat very cold bars.
A quick second dip or a spooned-on layer helps create an even shell that sticks.
Can I make these nut-free?
Yes. Use sunflower seed butter in place of peanut butter and skip the peanut toppings. Check that your chocolate is nut-free if needed.
What’s the carb count per bar?
Exact macros vary by brand and bar size.
For 16 bars, most versions land around 3–5g net carbs per bar when using sugar-free chocolate and a low-carb sweetener. Calculate based on your ingredients.
Why is my filling too stiff?
It may need a touch more cream or a few minutes at room temperature before spreading. Be sure your cream cheese is fully softened before mixing for a smoother blend.
Wrapping Up
Keto Peanut Butter Chocolate Ice Cream Bars are simple to make, rich, and incredibly satisfying.
They’re the sweet treat you can keep in the freezer for those moments when you want something cold, creamy, and chocolatey without the sugar crash. Batch them once, enjoy them all week, and tweak the flavors to make them your own.
Printable Recipe Card
Want just the essential recipe details without scrolling through the article? Get our printable recipe card with just the ingredients and instructions.