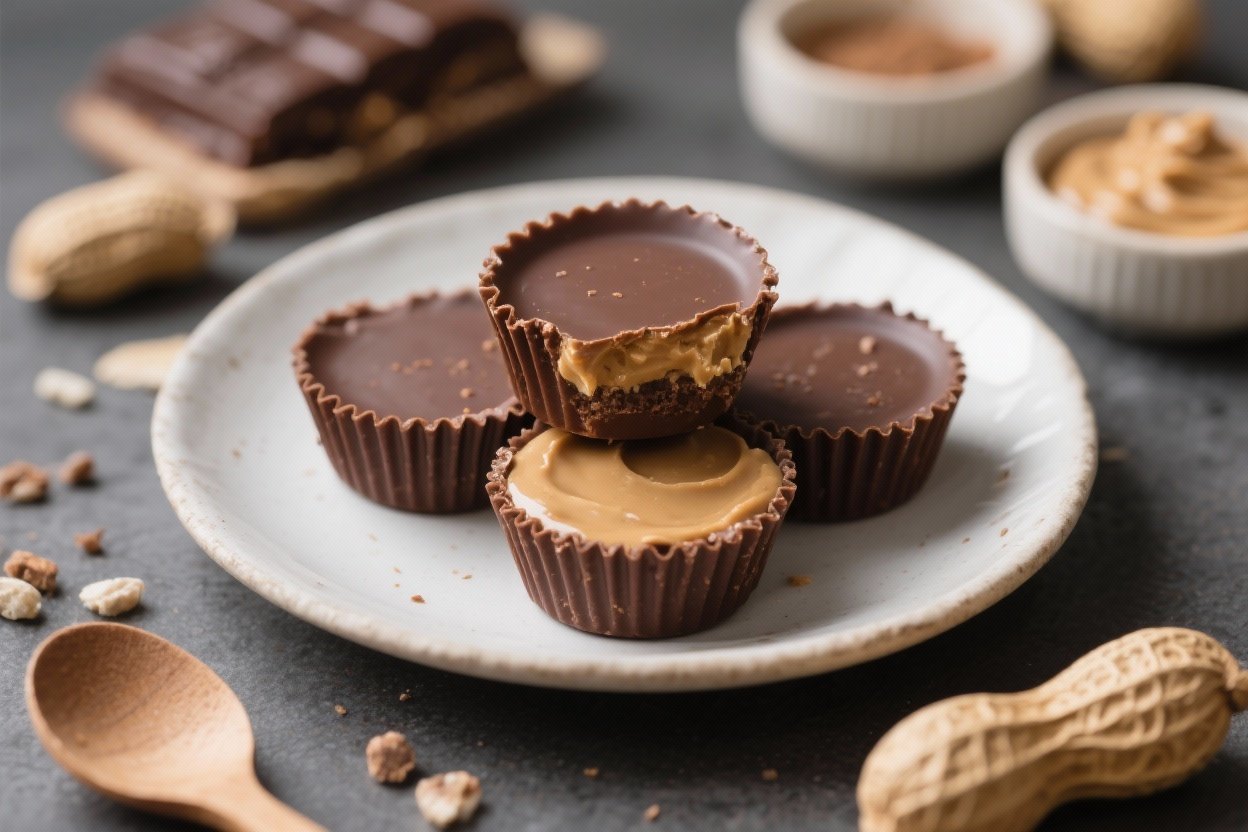
No-Bake Chocolate Peanut Butter Cups (Clean Ingredients) – Easy, Rich, and Naturally Sweetened
These no-bake chocolate peanut butter cups taste like a classic treat but are made with simple, clean ingredients. You’ll get a creamy peanut butter center, a smooth chocolate shell, and just the right amount of sweetness—no oven required. They come together quickly and set in the fridge or freezer.
Make a batch for snacks, dessert, or meal prep, and keep them on hand for when cravings hit. They’re satisfying, nostalgic, and a lot better for you than store-bought candy.
No-Bake Chocolate Peanut Butter Cups (Clean Ingredients) - Easy, Rich, and Naturally Sweetened
Ingredients
Method
- Prep your pan: Line a 12-cup mini muffin tin with paper liners. If using a standard muffin tin, you’ll get about 6 larger cups.
- Melt the chocolate: Add chocolate chips and coconut oil to a heatproof bowl. Melt in the microwave in 20–30 second bursts, stirring between each, until smooth. Alternatively, use a double boiler on the stove.
- Make the peanut butter filling: In a small bowl, stir together peanut butter, maple syrup, vanilla, and sea salt. If the mixture seems too runny, add almond flour 1 teaspoon at a time until thick but spreadable.
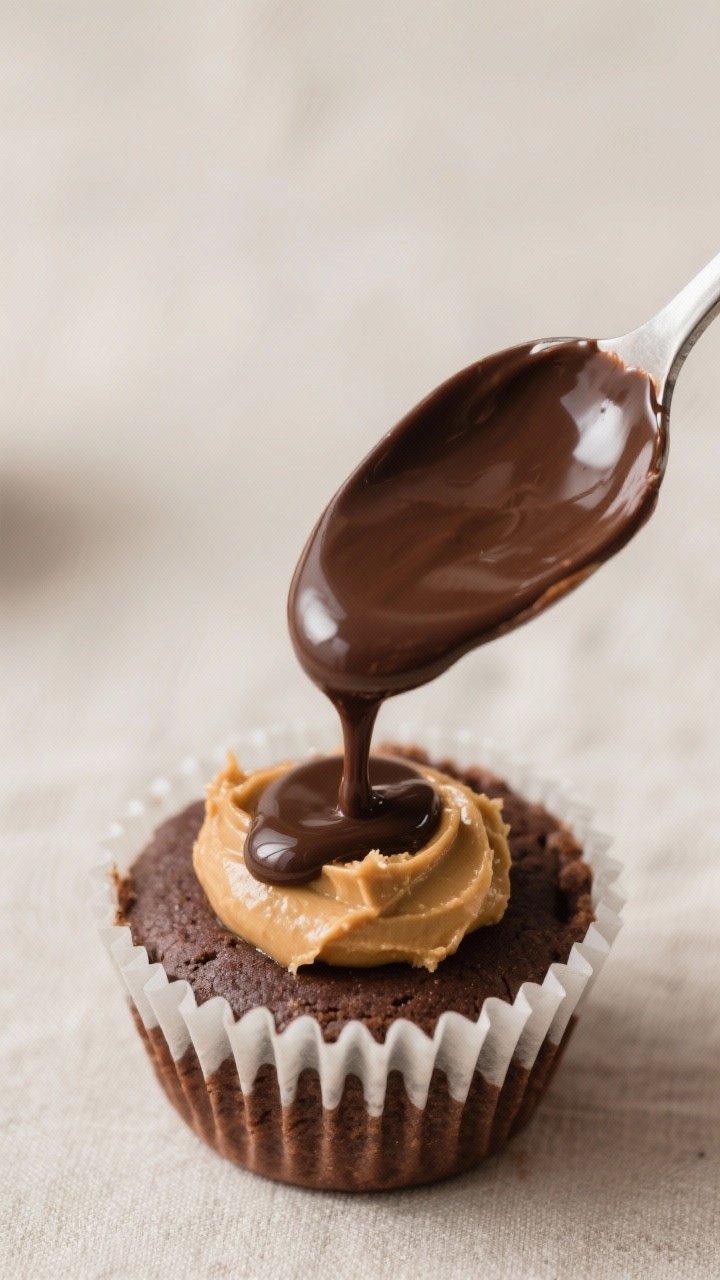
- Create the chocolate base: Spoon about 1 teaspoon of melted chocolate into each liner. Tilt the pan or use a spoon to coat the bottoms evenly. Place in the freezer for 5 minutes to set.
- Add the filling: Scoop about 1 teaspoon of peanut butter mixture onto each chocolate base. Gently flatten so it doesn’t touch the edges. This helps the top chocolate layer seal the cup.
- Top with chocolate: Spoon another 1–1.5 teaspoons of melted chocolate over each, making sure it spreads to the edges and covers the filling completely.
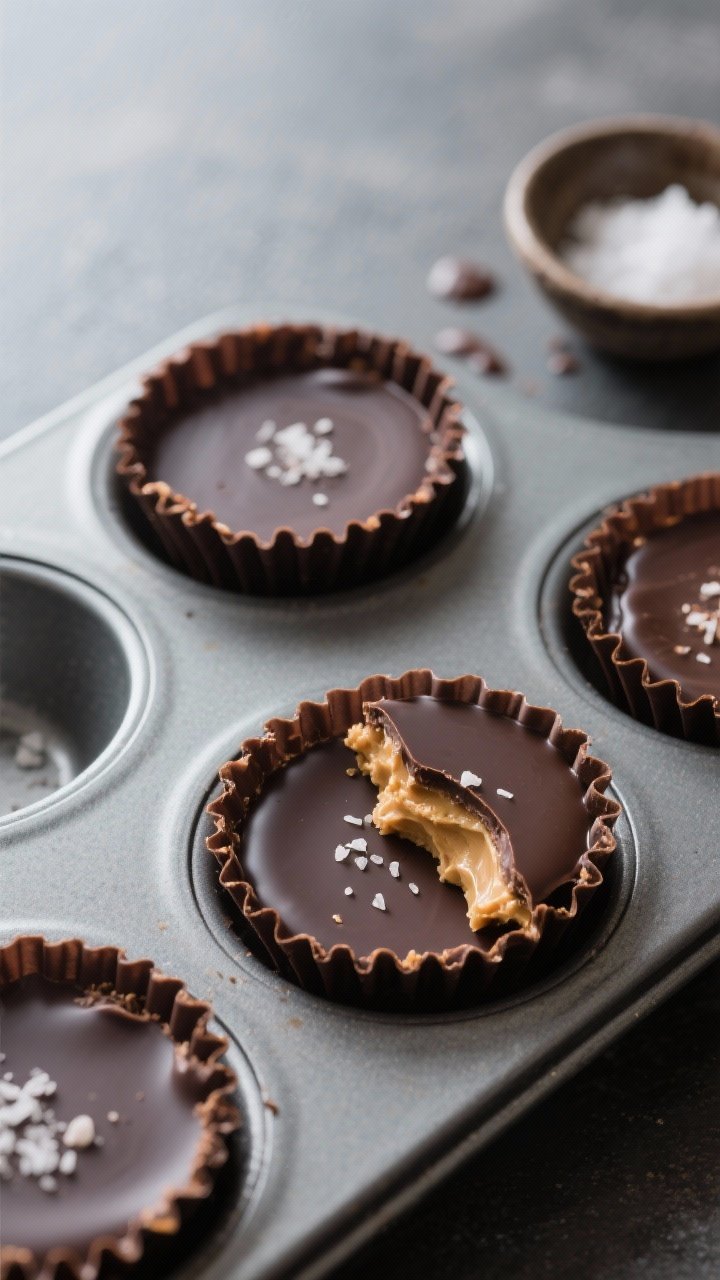
- Finish and set: Tap the pan gently on the counter to smooth the tops and release air bubbles. Sprinkle with flaky salt if using. Chill in the fridge for 20–30 minutes, or freeze for 10–15, until set.
- Serve: Peel away the liners and enjoy. Store extras using the tips below.
Overeating is a pattern. This helps you fix that problem. A quick reset for cravings, snacking, and “I’ll start tomorrow” moments.
Built for busy home cooks who want real-life structure. Simple steps that fit meal prep, family dinners, and late-night snack attacks.
Why This Recipe Works
This recipe relies on whole-food ingredients and straightforward techniques. Natural peanut butter creates a creamy, salty-sweet filling that pairs perfectly with dark chocolate.
A little coconut oil helps the chocolate melt smoothly and firm up with a crisp snap. Maple syrup brings gentle sweetness without refined sugar. With no baking, there’s less fuss and fewer dishes, but you still get a rich, indulgent bite.
Ingredients
- 1 cup dark chocolate chips (60–70% cacao), or chopped dark chocolate
- 2 tablespoons coconut oil (refined for neutral flavor, unrefined for coconut notes)
- 1/2 cup natural peanut butter (stirred well; creamy works best)
- 2–3 tablespoons maple syrup (adjust to taste)
- 1/2 teaspoon pure vanilla extract
- Pinch of fine sea salt (plus flaky salt for topping, optional)
- Optional add-ins: 1–2 tablespoons almond flour for thicker filling, or 1 tablespoon chia seeds for texture
Step-by-Step Instructions
- Prep your pan: Line a 12-cup mini muffin tin with paper liners.
If using a standard muffin tin, you’ll get about 6 larger cups.
- Melt the chocolate: Add chocolate chips and coconut oil to a heatproof bowl. Melt in the microwave in 20–30 second bursts, stirring between each, until smooth. Alternatively, use a double boiler on the stove.
- Make the peanut butter filling: In a small bowl, stir together peanut butter, maple syrup, vanilla, and sea salt.
If the mixture seems too runny, add almond flour 1 teaspoon at a time until thick but spreadable.
- Create the chocolate base: Spoon about 1 teaspoon of melted chocolate into each liner. Tilt the pan or use a spoon to coat the bottoms evenly. Place in the freezer for 5 minutes to set.
- Add the filling: Scoop about 1 teaspoon of peanut butter mixture onto each chocolate base.
Gently flatten so it doesn’t touch the edges. This helps the top chocolate layer seal the cup.
- Top with chocolate: Spoon another 1–1.5 teaspoons of melted chocolate over each, making sure it spreads to the edges and covers the filling completely.
- Finish and set: Tap the pan gently on the counter to smooth the tops and release air bubbles. Sprinkle with flaky salt if using.
Chill in the fridge for 20–30 minutes, or freeze for 10–15, until set.
- Serve: Peel away the liners and enjoy. Store extras using the tips below.
How to Store
- Refrigerator: Keep in an airtight container for up to 2 weeks. They’ll stay firm yet soft enough to bite.
- Freezer: Store for up to 3 months in a freezer-safe container.
Let sit at room temperature for 5–10 minutes before eating.
- Layering tip: Place parchment between layers to prevent sticking.

Benefits of This Recipe
- Clean ingredients: Made with dark chocolate, natural peanut butter, and maple syrup—no corn syrup or artificial additives.
- Balanced sweetness: Maple syrup provides a gentle sweetness without being cloying.
- Healthy fats: Peanut butter and dark chocolate offer satisfying fats that help curb cravings.
- Quick and no-bake: Minimal equipment and no oven time make this a go-to on busy days.
- Customizable: Easy to adapt for different diets or flavor preferences.
Common Mistakes to Avoid
- Using dry or separated peanut butter: Stir natural peanut butter thoroughly. Dry layers won’t spread well and can crumble.
- Overheating chocolate: Chocolate burns quickly. Melt gently and stir often for a silky finish.
- Too much filling: Keep filling slightly away from the edges so the top chocolate layer seals without gaps.
- Skipping the coconut oil: It helps the chocolate melt smoothly and set with a nice snap.
Without it, the texture may be dull or crumbly.
- Impatience during setting: Let them fully firm up before peeling the liners to avoid smudged tops and uneven edges.
Recipe Variations
- Almond Butter Cups: Swap peanut butter for almond butter and add a pinch of cinnamon.
- Crunchy Texture: Stir 2 tablespoons crushed peanuts or cacao nibs into the filling for crunch.
- Salted Caramel Twist: Add 1–2 teaspoons date syrup to the filling and finish with extra flaky salt.
- Protein Boost: Mix 1 scoop unflavored or vanilla protein powder into the peanut butter. Add a splash of almond milk if too thick.
- Nut-Free Option: Use sunflower seed butter. Add an extra pinch of salt and a touch more maple syrup to balance flavor.
- Extra Dark: Use 80–85% chocolate and reduce maple syrup in the filling to 1–2 tablespoons.
- Layered Look: Make three thin chocolate layers (bottom, middle, top) for a stripe effect, chilling 3–4 minutes between layers.
FAQ
Can I use honey instead of maple syrup?
Yes.
Honey works well but is a bit sweeter and thicker. Start with 1–2 tablespoons, taste, and adjust. Note that honey will make the filling slightly stickier.
What if I don’t have coconut oil?
You can melt chocolate without it, but the cups may set a bit softer and be harder to spread.
A teaspoon of avocado oil can work in a pinch, though it won’t firm as much.
How do I prevent the chocolate from blooming or turning white?
Bloom happens when chocolate heats and cools unevenly. Melt gently, avoid water contact, and store in a cool, dry place. Bloom won’t affect taste but can change appearance.
Can I make these without a muffin tin?
Yes.
Spread half the chocolate on a parchment-lined loaf pan, chill briefly, add the filling, then top with remaining chocolate. Chill and slice into squares.
Are these gluten-free and dairy-free?
They are naturally gluten-free. For dairy-free, choose dairy-free dark chocolate.
Most 70% bars and chips are dairy-free, but always check labels.
How can I make them less sweet?
Use higher-cacao chocolate and reduce the maple syrup to 1 tablespoon. A pinch more salt enhances flavor without extra sugar.
Can I use chunky peanut butter?
Absolutely. Chunky peanut butter adds texture.
If it’s very thick, warm it slightly so it spreads easily.
Why did my chocolate seize?
Even a drop of water can seize chocolate. Make sure bowls and utensils are completely dry, and melt slowly. If it seizes, stir in a teaspoon of warm coconut oil at a time to loosen.
Final Thoughts
No-bake chocolate peanut butter cups are a simple, satisfying treat you can feel good about eating.
With clean ingredients and quick prep, they’re perfect for busy weeks and sweet cravings alike. Customize them to your taste, keep a stash in the fridge or freezer, and enjoy a rich, classic flavor made the better-for-you way.
Printable Recipe Card
Want just the essential recipe details without scrolling through the article? Get our printable recipe card with just the ingredients and instructions.