No-Bake Chocolate Peanut Butter Protein Rice Krispie Treats – Easy, Chewy, and Satisfying
These no-bake bars hit all the right notes: chewy, chocolatey, and lightly sweet with a big peanut butter payoff. They’re the kind of treat that doubles as a snack and sneaks in a solid boost of protein. Best of all, they come together in minutes and set up in the fridge—no oven, no fuss.
Need More Easy Dinner Ideas?
Get my FREE 7-Day Easy Dinner Reset and enjoy a full week of healthy dinners without the meal-planning stress.
Keep a batch on hand for post-workout bites, lunchbox treats, or a late-night sweet tooth. They’re simple, satisfying, and feel like dessert without the crash.

No-Bake Chocolate Peanut Butter Protein Rice Krispie Treats - Easy, Chewy, and Satisfying
Ingredients
Method
- Prep your pan: Line an 8x8-inch square pan with parchment, letting some overhang for easy lifting. Lightly grease the parchment.
- Measure the dry: Add puffed rice cereal to a large mixing bowl. If your protein powder has clumps, sift it in or whisk it separately to break up lumps.
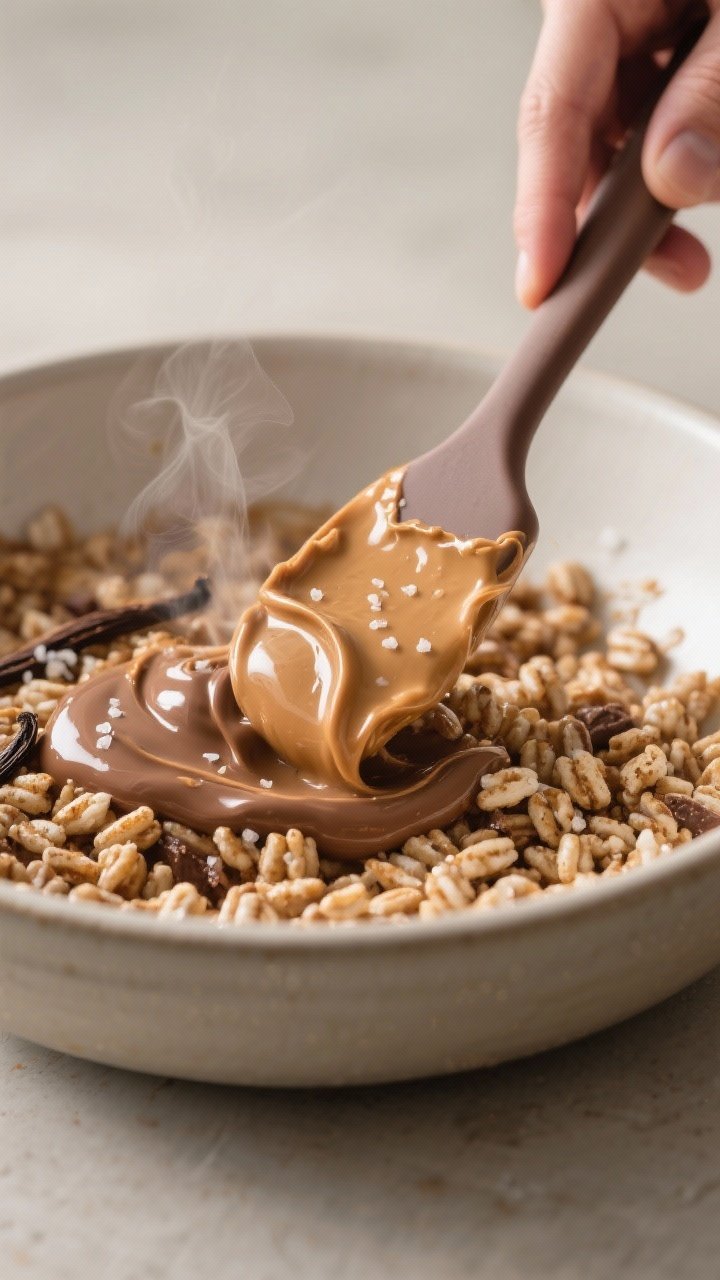
- Melt the base: In a small saucepan over low heat, melt peanut butter, chocolate chips, and coconut oil. Stir continuously until smooth and glossy. Don’t overheat—gentle heat prevents scorching.
- Sweeten and flavor: Remove from heat. Stir in honey or maple syrup, vanilla, and a pinch of salt. Taste and adjust sweetness to your liking.
- Add protein powder: Whisk the protein powder into the warm peanut butter-chocolate mixture until fully combined. It should look thick but pourable.
- Combine with cereal: Pour the mixture over the puffed rice. Use a spatula to fold until every piece is coated. Work quickly; as it cools, it firms up.
- Press into pan: Scrape the mixture into your prepared pan. Lightly press it into an even layer using a spatula or a piece of parchment to avoid sticking. Don’t crush the cereal.
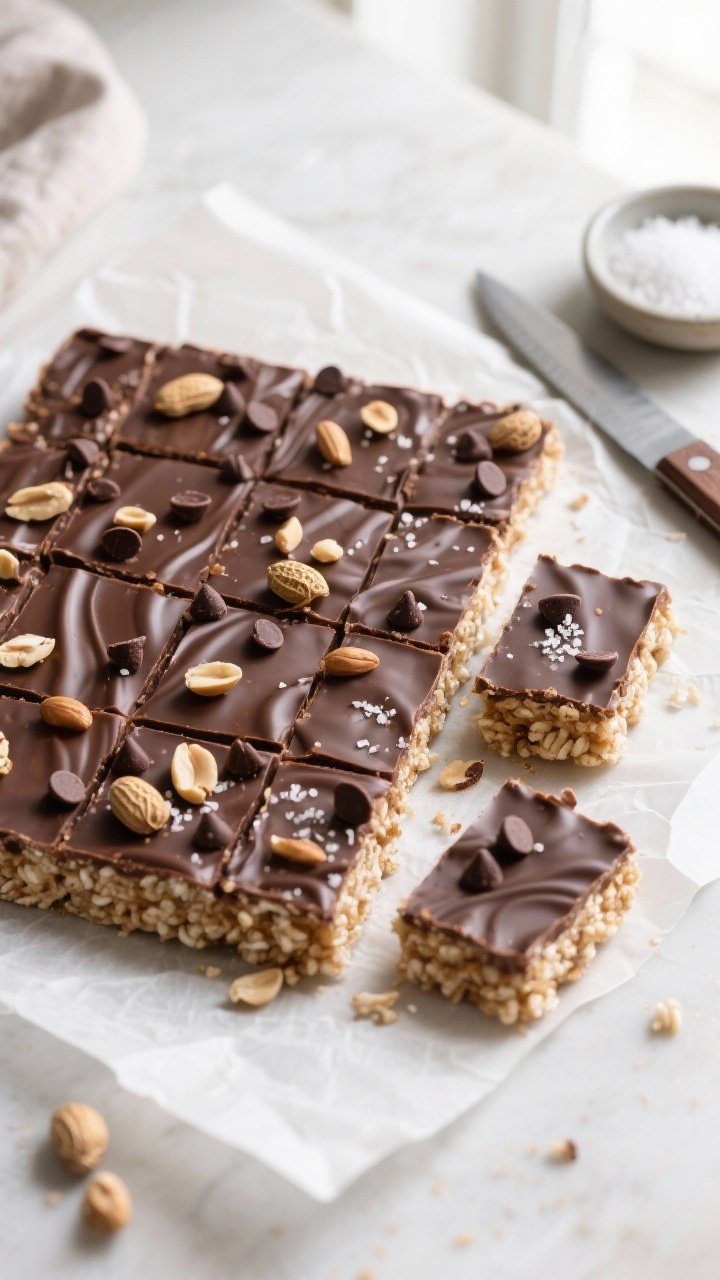
- Optional toppings: Sprinkle mini chocolate chips, chopped peanuts, or flaky sea salt on top. Gently press them in so they stick.
- Chill: Refrigerate for 45–60 minutes, or until firm. For faster set, pop it in the freezer for 20–25 minutes.
- Slice and serve: Lift the slab out using the parchment and cut into 12–16 bars. Enjoy cold for clean edges and extra chew.
What Makes This Recipe So Good
- No bake, minimal mess: Everything happens in one pot and a pan. No oven, no complicated steps.
- Protein-packed: A scoop or two of protein powder helps balance the carbs and sugar, so the bars actually keep you full.
- Chewy and crunchy: The puffed rice gives crispy texture while the peanut butter-chocolate base keeps things fudgy.
- Flexible sweetness: Adjust sweetness with honey, maple syrup, or a low-sugar syrup depending on your goals.
- Great for meal prep: They keep well in the fridge or freezer and travel nicely.
Shopping List
- Puffed rice cereal (like Rice Krispies or a similar brand)
- Natural peanut butter (creamy; no-stir works best)
- Chocolate chips (semi-sweet or dark)
- Protein powder (vanilla or chocolate; whey or plant-based)
- Honey or maple syrup (or a reduced-sugar syrup)
- Coconut oil (or butter)
- Vanilla extract
- Salt (a pinch, to brighten flavor)
- Optional toppings: mini chocolate chips, flaky sea salt, chopped peanuts, or a drizzle of melted chocolate
How to Make It
- Prep your pan: Line an 8×8-inch square pan with parchment, letting some overhang for easy lifting.
Lightly grease the parchment.
- Measure the dry: Add puffed rice cereal to a large mixing bowl. If your protein powder has clumps, sift it in or whisk it separately to break up lumps.
- Melt the base: In a small saucepan over low heat, melt peanut butter, chocolate chips, and coconut oil. Stir continuously until smooth and glossy.
Don’t overheat—gentle heat prevents scorching.
- Sweeten and flavor: Remove from heat. Stir in honey or maple syrup, vanilla, and a pinch of salt. Taste and adjust sweetness to your liking.
- Add protein powder: Whisk the protein powder into the warm peanut butter-chocolate mixture until fully combined.
It should look thick but pourable.
- Combine with cereal: Pour the mixture over the puffed rice. Use a spatula to fold until every piece is coated. Work quickly; as it cools, it firms up.
- Press into pan: Scrape the mixture into your prepared pan.
Lightly press it into an even layer using a spatula or a piece of parchment to avoid sticking. Don’t crush the cereal.
- Optional toppings: Sprinkle mini chocolate chips, chopped peanuts, or flaky sea salt on top. Gently press them in so they stick.
- Chill: Refrigerate for 45–60 minutes, or until firm.
For faster set, pop it in the freezer for 20–25 minutes.
- Slice and serve: Lift the slab out using the parchment and cut into 12–16 bars. Enjoy cold for clean edges and extra chew.
How to Store
- Fridge: Store in an airtight container for up to 1 week. Separate layers with parchment to prevent sticking.
- Freezer: Freeze individually wrapped bars for up to 2 months.
Thaw at room temperature for 10–15 minutes, or enjoy slightly chilled.
- On the go: If packing for later, keep them cool. They soften at warm room temp because of the peanut butter and coconut oil.
Health Benefits
- Protein support: Protein powder plus peanut butter helps with satiety and muscle repair, making these bars a smarter snack than typical sweets.
- Better fats: Peanut butter and coconut oil provide satisfying fats that help stabilize energy levels.
- Controlled sweetness: You choose the sweetener and amount, keeping sugar in check compared to standard marshmallow-based treats.
- Whole-food ingredients: Simple, recognizable ingredients without artificial marshmallow binders.
What Not to Do
- Don’t overheat the chocolate and peanut butter: High heat can seize chocolate and split oils. Low and slow is key.
- Don’t add protein powder off heat without whisking: Stir it in while the mixture is warm and smooth to avoid gritty bits.
- Don’t use ultra-runny natural peanut butter without adjusting: If your peanut butter is very drippy, add an extra tablespoon of protein powder or a bit more cereal to keep bars firm.
- Don’t pack the cereal too hard: Press gently so the bars hold together but stay light and crispy.
- Don’t skip salt: Even a pinch makes the chocolate and peanut butter pop.
Recipe Variations
- Almond or cashew butter: Swap peanut butter 1:1 for a different flavor profile or to avoid peanuts.
- High-fiber boost: Mix in 2–3 tablespoons of ground flaxseed, chia seeds, or hemp hearts with the cereal.
- Crunchy add-ins: Stir in chopped roasted peanuts, cacao nibs, or toasted coconut flakes for extra texture.
- Vegan-friendly: Use dairy-free chocolate chips and maple syrup.
Choose a plant-based protein powder.
- Lower sugar: Use dark chocolate (70%+), reduce the sweetener slightly, and opt for an unsweetened protein powder.
- Peanut butter cup style: Add a thin layer of melted chocolate on top and finish with a sprinkle of flaky sea salt.
- Mocha twist: Whisk 1–2 teaspoons of instant espresso powder into the melted mixture.
- Cookie crunch: Replace 1 cup of cereal with small pieces of high-protein cereal or crushed high-fiber crackers to vary texture.
FAQ
What kind of protein powder works best?
Never Wonder What's For Dinner Again
Save time, eat healthier, and take the stress out of dinner. Get a full week of easy healthy dinners delivered straight to your inbox.
Whey blends usually mix smoothly and give a fudgy texture. Plant-based powders work too but can be a bit thicker, so you may need a splash more melted peanut butter or a teaspoon of coconut oil to loosen the mixture.
Can I make these nut-free?
Yes. Use sunflower seed butter instead of peanut butter and check your chocolate chips to ensure they’re nut-free.
The flavor will be slightly earthier but still delicious.
Why are my bars crumbly?
They likely need more moisture or binder. Add a touch more melted peanut butter or coconut oil, or reduce the cereal slightly. Also, make sure you pressed the mixture together firmly enough before chilling.
How sweet are these?
They’re moderately sweet, similar to a dark chocolate treat.
If you prefer sweeter bars, add an extra tablespoon of honey or maple syrup, or use semi-sweet chocolate chips instead of dark.
Do I have to chill them?
Chilling helps the bars set and slice cleanly. Without chilling, they’ll be softer and more likely to fall apart, especially in warm kitchens.
Can I double the recipe?
Absolutely. Use a 9×13-inch pan, and increase chill time slightly.
Make sure your mixing bowl is large enough to coat the cereal evenly.
Are these gluten-free?
If you use certified gluten-free puffed rice cereal and chocolate chips, yes. Regular Rice Krispies may contain malt, which is not gluten-free, so check labels.
Can I use cocoa powder instead of chocolate chips?
You can, but you’ll need extra sweetener and fat to balance the bitterness and texture. Chocolate chips add both sweetness and structure, so results vary when swapping.
Wrapping Up
No-Bake Chocolate Peanut Butter Protein Rice Krispie Treats are the low-effort, high-reward snack that tastes like dessert and fuels your day.
They come together fast, store well, and adapt to whatever ingredients you have on hand. Keep the base formula, tweak the sweetness and add-ins, and make them your own. Once you have a batch in the fridge, “What’s for a snack?” gets an easy answer.
Printable Recipe Card
Want just the essential recipe details without scrolling through the article? Get our printable recipe card with just the ingredients and instructions.
Loved This Recipe?
If you're looking for more simple, healthy dinners your family will actually eat, grab my FREE 7-Day Easy Dinner Reset. You'll get 7 easy dinner recipes, simple grocery lists, and a done-for-you plan that takes the stress out of mealtime.