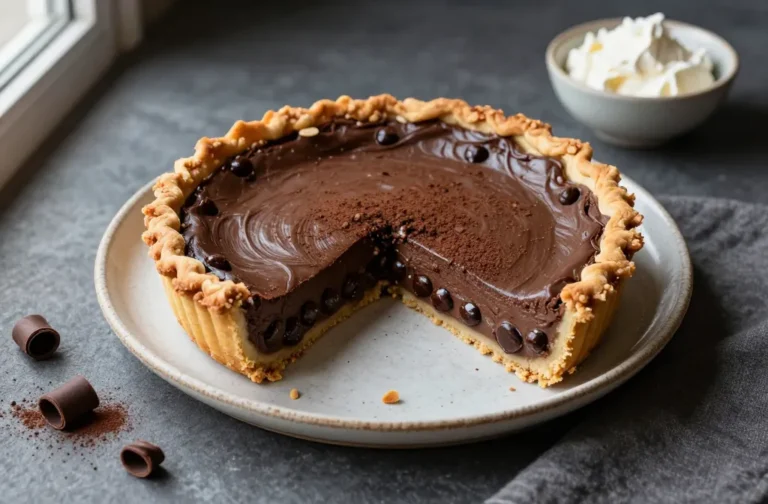
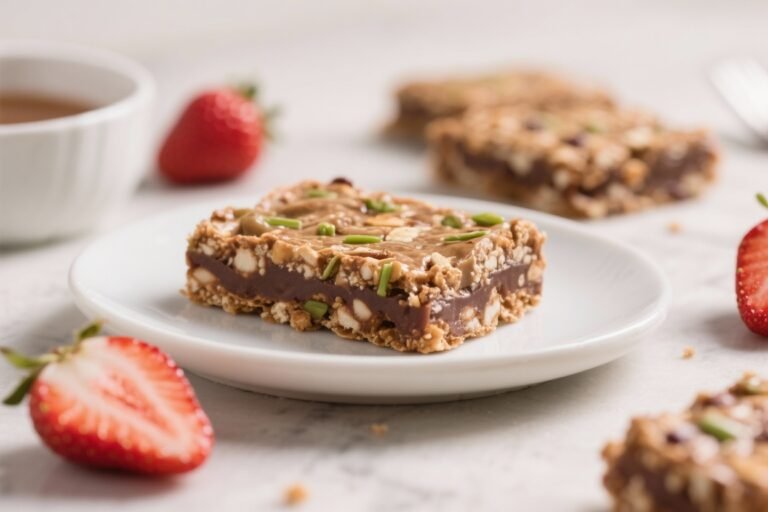
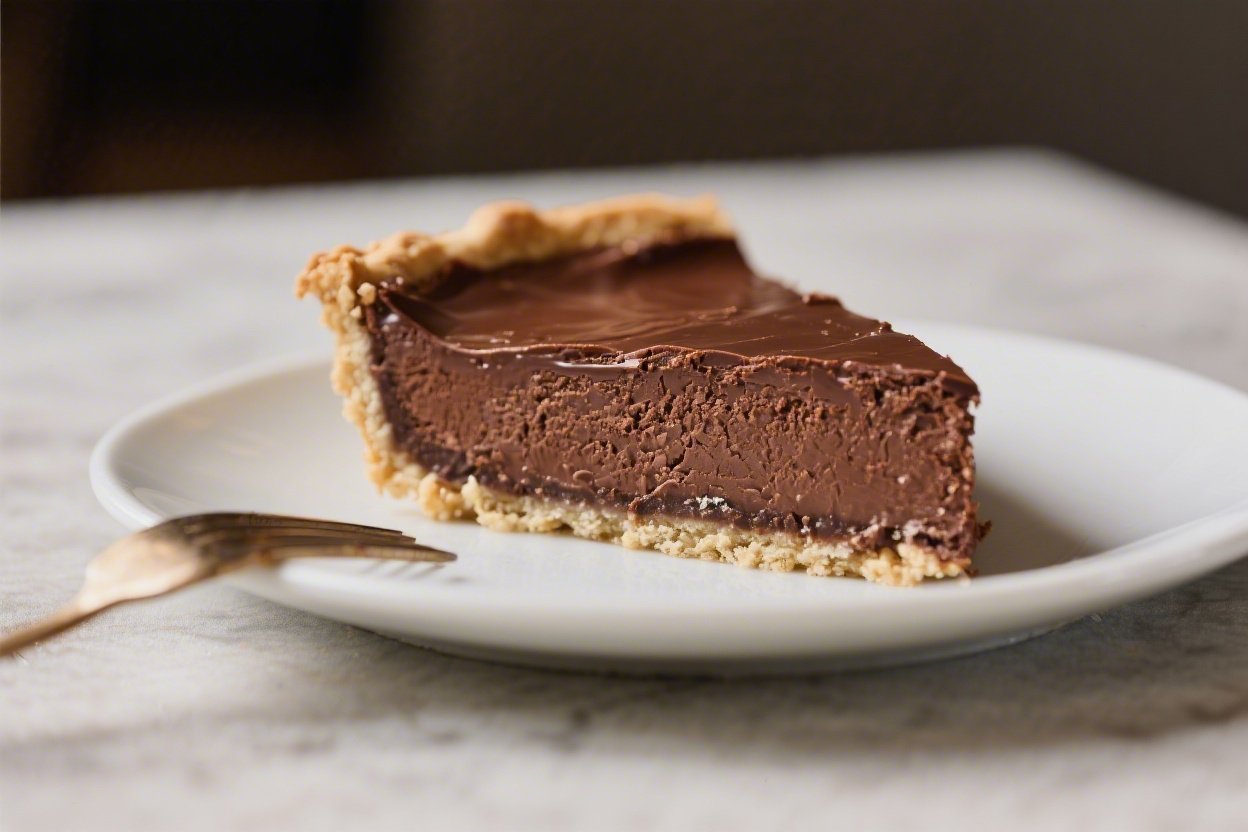
Healthy Chocolate Pie – Rich Flavor With Better-For-You Ingredients
Chocolate pie doesn’t have to be a sugar bomb. With a few smart swaps, you can get that silky, chocolatey slice you crave and still feel good about what’s in it. This version leans on whole-food ingredients, natural sweetness, and a creamy texture that feels indulgent without the usual heaviness.
Need More Easy Dinner Ideas?
Get my FREE 7-Day Easy Dinner Reset and enjoy a full week of healthy dinners without the meal-planning stress.
It’s simple to make, crowd-friendly, and flexible enough to fit different diets. Whether you’re new to “lightened-up” desserts or a seasoned pro, this healthy chocolate pie will win you over.
Ingredients
Method
- Prepare the pan: Lightly grease a 9-inch pie dish or springform pan. Line the bottom with parchment if using a springform.
- Make the crust: In a food processor, pulse oats and nuts until they form a coarse meal. Add cocoa powder, salt, maple syrup, and coconut oil. Pulse until the mixture clumps when pressed. If dry, add 1–2 teaspoons more oil.
- Press and set: Firmly press the crust mixture into the pan, working up the sides. Use the bottom of a measuring cup for a smooth, compact surface. Chill in the fridge while you make the filling.
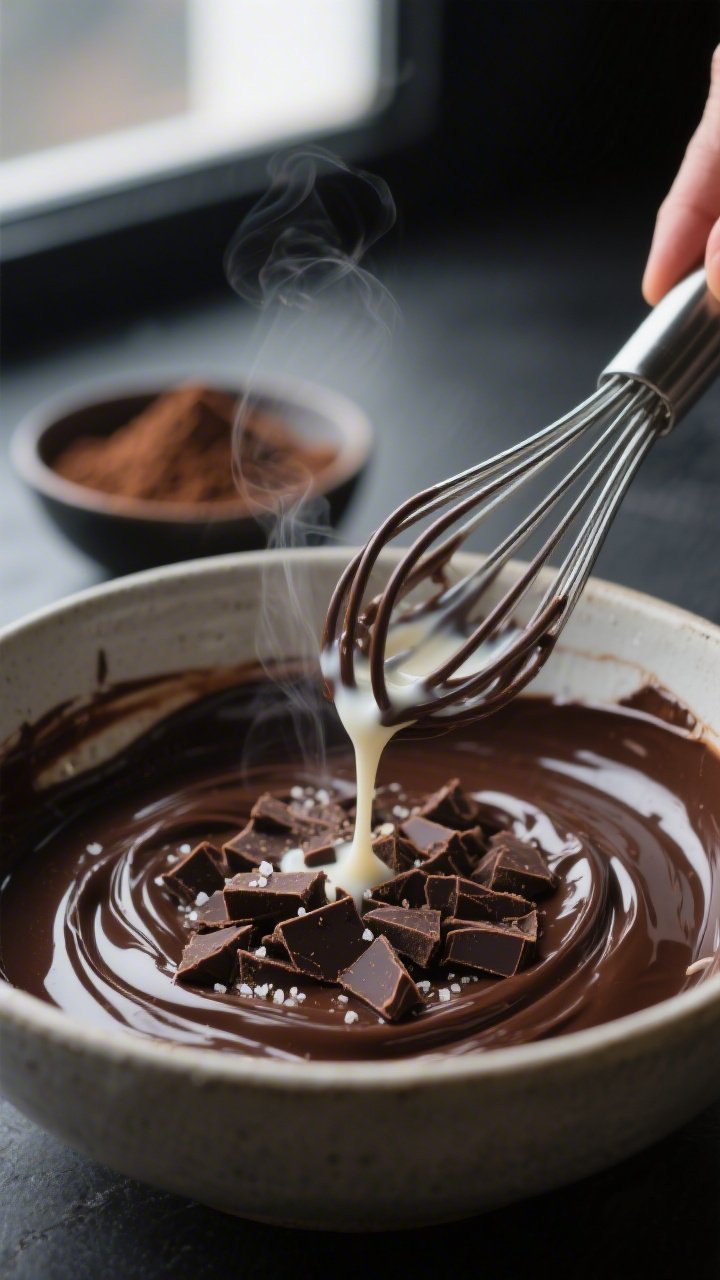
- Melt the chocolate: Place chopped dark chocolate in a heat-safe bowl. Warm the coconut milk until steaming (not boiling), then pour it over the chocolate. Let sit 2 minutes, then whisk until smooth and glossy.
- Build the filling: Whisk in maple syrup, vanilla, salt, and cocoa powder if using. Let the mixture cool to just warm, then fold in Greek yogurt until fully smooth. Do not add yogurt to hot chocolate or it may curdle.
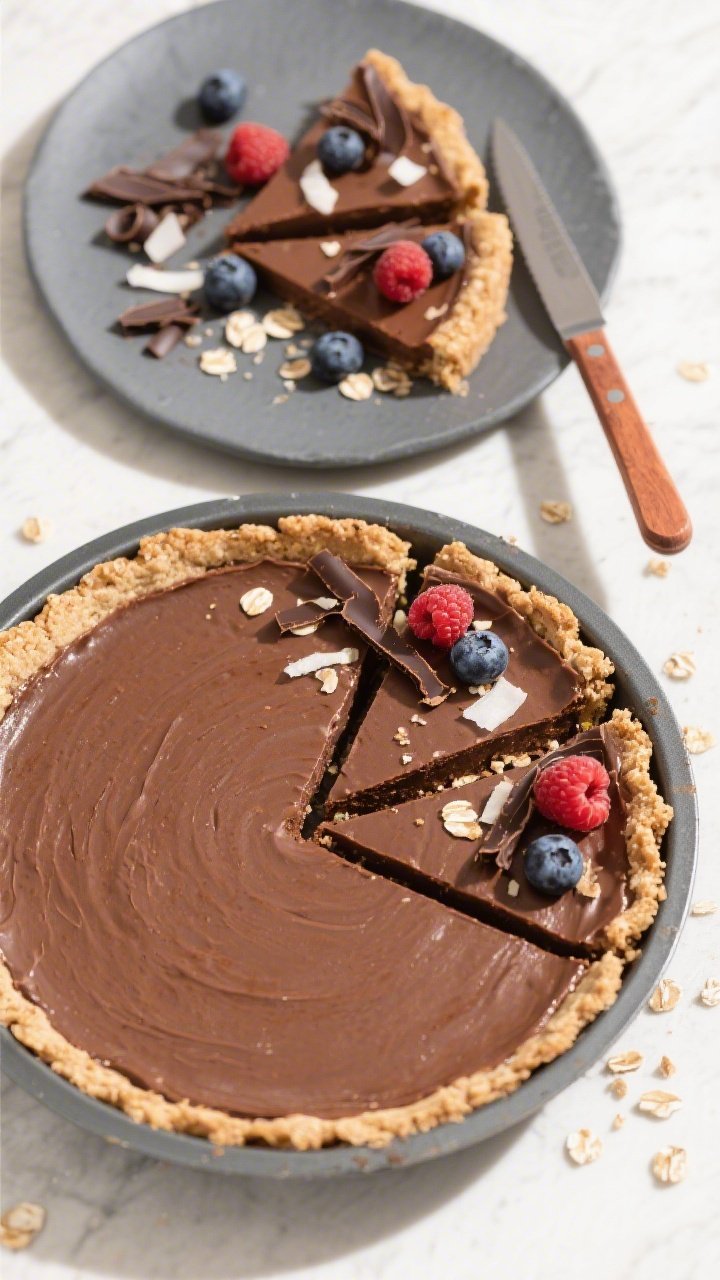
- Fill the crust: Pour the filling into the chilled crust. Smooth the top with a spatula. Tap the pan gently on the counter to release air bubbles.
- Chill to set: Refrigerate for at least 4 hours, preferably overnight, until firm and sliceable.
- Garnish and serve: Top with berries, shaved chocolate, or toasted coconut. Slice with a warm knife for clean edges.
Why This Recipe Works
This recipe keeps the flavor big and the ingredient list simple. Instead of heavy cream and loads of sugar, it uses creamy Greek yogurt and a touch of coconut milk for body, plus maple syrup to sweeten.
A dark chocolate base gives deep cocoa notes without going overboard on sugar.
The crust is a key upgrade. A nut-and-oat crust brings in fiber, healthy fats, and a subtle toasty flavor. It sets up nicely, slices cleanly, and supports the silky filling.
The result is a pie that tastes rich, but sits light.
What You’ll Need
- For the crust:
- 1 cup rolled oats
- 1 cup raw walnuts or almonds
- 2 tablespoons cocoa powder
- 2 tablespoons maple syrup or honey
- 2 tablespoons melted coconut oil (or avocado oil)
- Pinch of sea salt
- For the filling:
- 6 ounces dark chocolate (70–85% cacao), finely chopped
- 1/2 cup canned light coconut milk (well-shaken)
- 1 cup plain Greek yogurt (2% or whole for extra creaminess)
- 1/4 cup maple syrup (adjust to taste)
- 1 teaspoon pure vanilla extract
- 1/4 teaspoon sea salt
- Optional: 2 tablespoons cocoa powder for extra intensity
- For topping (optional):
- Fresh berries
- Shaved dark chocolate
- Toasted coconut flakes
How to Make It
- Prepare the pan: Lightly grease a 9-inch pie dish or springform pan. Line the bottom with parchment if using a springform.
- Make the crust: In a food processor, pulse oats and nuts until they form a coarse meal. Add cocoa powder, salt, maple syrup, and coconut oil.
Pulse until the mixture clumps when pressed. If dry, add 1–2 teaspoons more oil.
- Press and set: Firmly press the crust mixture into the pan, working up the sides. Use the bottom of a measuring cup for a smooth, compact surface.
Chill in the fridge while you make the filling.
- Melt the chocolate: Place chopped dark chocolate in a heat-safe bowl. Warm the coconut milk until steaming (not boiling), then pour it over the chocolate. Let sit 2 minutes, then whisk until smooth and glossy.
- Build the filling: Whisk in maple syrup, vanilla, salt, and cocoa powder if using.
Let the mixture cool to just warm, then fold in Greek yogurt until fully smooth. Do not add yogurt to hot chocolate or it may curdle.
- Fill the crust: Pour the filling into the chilled crust. Smooth the top with a spatula. Tap the pan gently on the counter to release air bubbles.
- Chill to set: Refrigerate for at least 4 hours, preferably overnight, until firm and sliceable.
- Garnish and serve: Top with berries, shaved chocolate, or toasted coconut.
Slice with a warm knife for clean edges.
Keeping It Fresh
Store the pie covered in the refrigerator for up to 4 days. The crust will stay pleasantly crisp for the first 48 hours, then soften slightly but still taste great. For the best texture, keep toppings off until serving.
Freezing tips: Freeze slices on a tray until solid, then wrap individually.
They’ll keep well for up to 2 months. Thaw in the fridge for a few hours or on the counter for 20–30 minutes before serving.
Benefits of This Recipe
- Lower sugar, big flavor: Dark chocolate and cocoa deliver intensity, so you can use less sweetener without losing satisfaction.
- Better fats and fiber: Nuts and oats support fullness and bring a gentle crunch to balance the silky filling.
- Protein boost: Greek yogurt adds creaminess and protein, helping steady energy instead of a quick spike and crash.
- Straightforward steps: No baking the filling, no fussy techniques, and it sets in the fridge.
- Adaptable: Easy to make gluten-free, dairy-free, or vegan with simple swaps.
What Not to Do
Never Wonder What's For Dinner Again
Save time, eat healthier, and take the stress out of dinner. Get a full week of easy healthy dinners delivered straight to your inbox.
- Don’t overheat the chocolate. Boiling liquids can seize chocolate. Warm coconut milk until just steaming.
- Don’t skip chilling. The pie needs time to firm up.
Cutting too soon leads to messy slices.
- Don’t add cold yogurt to hot chocolate. Let the chocolate mixture cool slightly. Extreme temperature differences can cause a grainy texture.
- Don’t over-sweeten early. Taste the filling after whisking in yogurt; dark chocolate flavors mellow as it chills. Adjust at the end if needed.
- Don’t neglect the salt. A small pinch lifts the chocolate and balances sweetness.
Variations You Can Try
- Vegan version: Swap Greek yogurt for a thick coconut yogurt and use dairy-free dark chocolate.
Choose maple syrup or date syrup for sweetening.
- Silken tofu filling: Blend 12 ounces silken tofu with melted dairy-free chocolate, vanilla, and a touch of maple syrup. Pour into the same crust and chill. Extra smooth and high in protein.
- Avocado mousse pie: Blend 2 ripe avocados with melted dark chocolate, 3–4 tablespoons maple syrup, and vanilla.
Fold in a little cocoa for richness. Very creamy and naturally dairy-free.
- Espresso kick: Whisk 1–2 teaspoons instant espresso powder into the chocolate mixture to deepen the flavor.
- Superfood swirl: After pouring the filling, swirl in 2 tablespoons almond butter or tahini for nutty ribbons.
- Gluten-free crust: Use certified gluten-free oats. Everything else is naturally gluten-free.
- High-fiber add-ins: Stir 1–2 tablespoons ground flaxseed into the crust mixture for extra structure and fiber.
FAQ
Can I use regular milk instead of coconut milk?
Yes.
Use whole or 2% milk, heat it until steaming, and proceed as written. The coconut milk gives a silkier finish, but dairy milk still works well.
What if my filling looks grainy?
It likely got too hot or the yogurt was added while the chocolate was still warm-hot. Whisk in a tablespoon of warm milk and keep whisking gently.
If needed, blend briefly with an immersion blender to smooth it out.
How sweet is this pie?
It’s moderately sweet, leaning toward a dark chocolate profile. If you prefer sweeter, add another 1–2 tablespoons maple syrup after tasting the filling, or choose chocolate closer to 60–65% cacao.
Can I bake the crust?
Yes. Bake at 350°F (175°C) for 8–10 minutes, then cool completely.
Baking gives a toastier flavor and a slightly firmer slice.
Is there a nut-free option?
Use sunflower seeds or pumpkin seeds instead of nuts, or make an oat-only crust by increasing oats to 1 1/2 cups and adding 1–2 extra tablespoons coconut oil to help it bind.
How do I get clean slices?
Chill overnight, then use a thin, sharp knife dipped in hot water and dried between cuts. Wipe the blade between slices for tidy edges.
Can I make it ahead?
Absolutely. This pie is ideal for making 24 hours ahead.
Add toppings right before serving to keep them fresh and crisp.
Final Thoughts
This healthy chocolate pie proves you don’t need heavy cream or cups of sugar to get a lush, satisfying dessert. With a nutty, fiber-rich crust and a smooth chocolate filling, it lands right in that sweet spot between indulgence and balance. Keep it classic, or tailor it to your needs with the variations above.
Either way, it’s a dessert you’ll want to make again and again—simple, reliable, and seriously good.
Printable Recipe Card
Want just the essential recipe details without scrolling through the article? Get our printable recipe card with just the ingredients and instructions.
Loved This Recipe?
If you're looking for more simple, healthy dinners your family will actually eat, grab my FREE 7-Day Easy Dinner Reset. You'll get 7 easy dinner recipes, simple grocery lists, and a done-for-you plan that takes the stress out of mealtime.