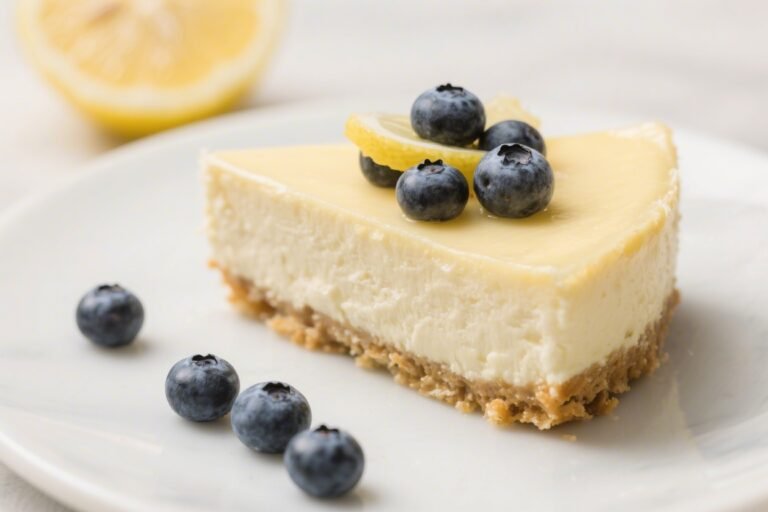
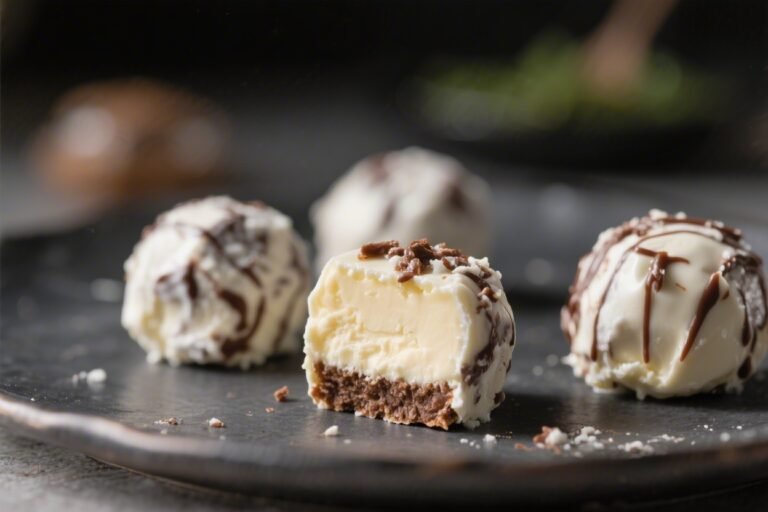
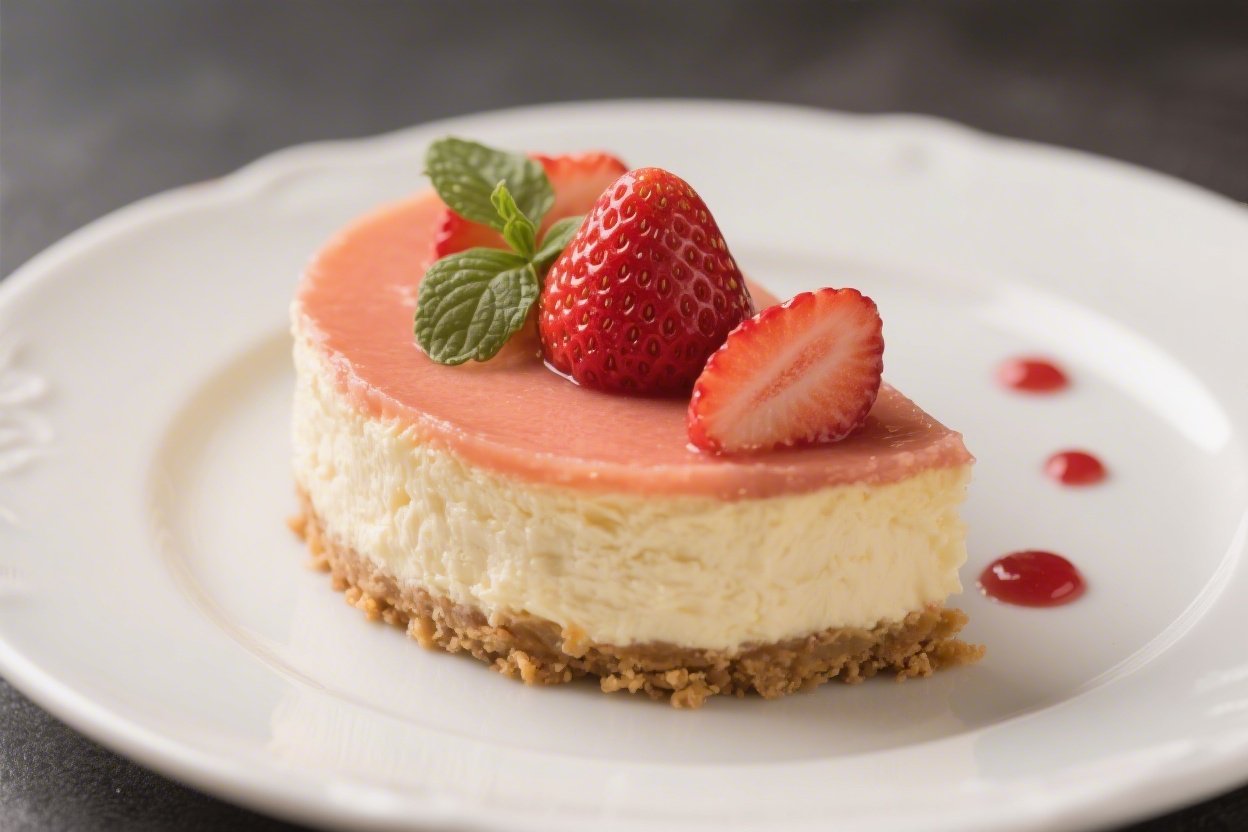
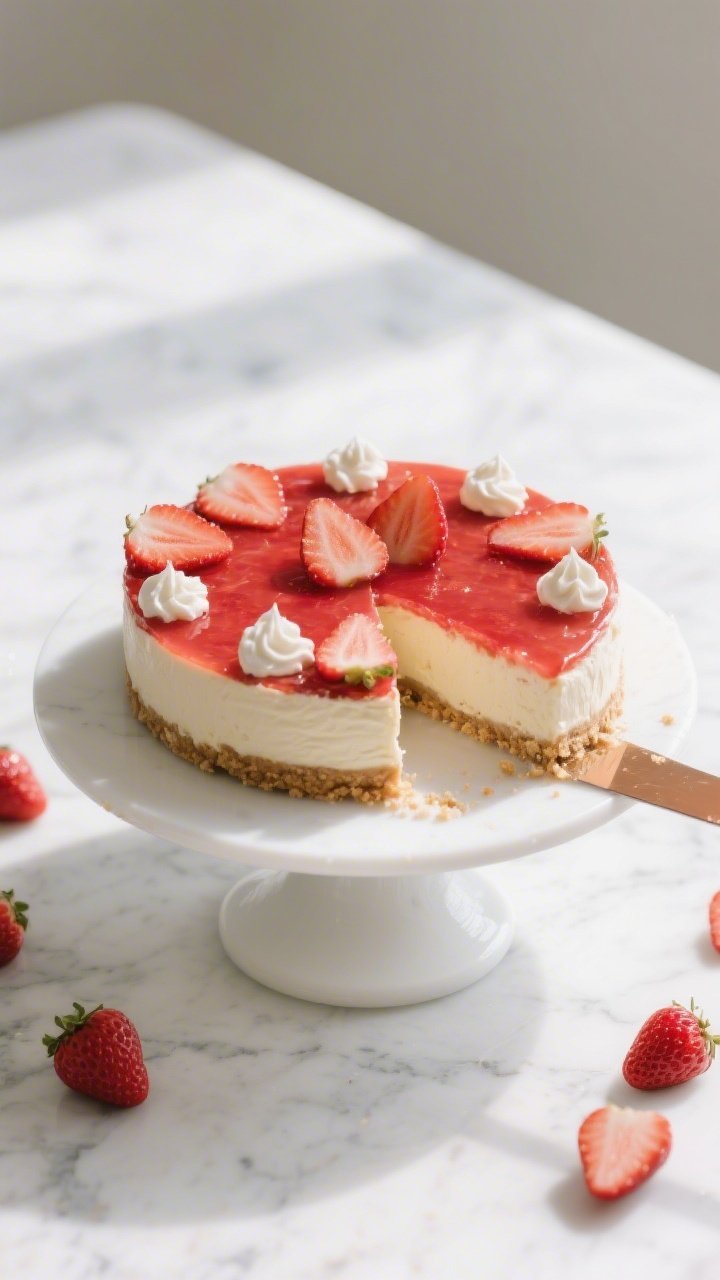
Keto Strawberry Cheesecake – Creamy, Fresh, and Low-Carb
This Keto Strawberry Cheesecake brings classic dessert vibes without the sugar crash. It’s rich, creamy, and topped with bright, fresh strawberries for a pop of color and flavor. You’ll get the full cheesecake experience—silky filling, real crust, and a glossy strawberry finish—while staying low-carb.
Need More Easy Dinner Ideas?
Get my FREE 7-Day Easy Dinner Reset and enjoy a full week of healthy dinners without the meal-planning stress.
It’s simple enough for a weeknight treat, yet special enough for guests. If you’ve been missing cheesecake on keto, this one will hit the spot.
Ingredients
Method
- Prep the pan and oven: Heat the oven to 325°F (163°C). Line the bottom of a 9-inch springform pan with parchment. Lightly grease the sides to prevent sticking.
- Make the crust: In a bowl, mix almond flour, powdered sweetener, and salt. Stir in melted butter and vanilla until the mixture looks like damp sand. Press evenly into the pan, pushing slightly up the sides.
- Par-bake the crust: Bake for 10–12 minutes until set and lightly golden. Set aside to cool while you make the filling. Lower oven to 300°F (149°C) for the cheesecake.
- Beat the cream cheese: With a stand mixer or hand mixer on medium-low, beat cream cheese until completely smooth and lump-free. Scrape the bowl well. This step is key to a silky texture.
- Add sweetener and flavor: Add powdered sweetener, lemon zest, vanilla, and salt. Beat on low until fully blended. Avoid whipping in too much air.
- Mix in eggs and sour cream: Beat in eggs one at a time on low, just until combined. Add sour cream and mix on low until smooth. Scrape the bowl and mix 5–10 seconds more.
- Set up a water bath (optional but helpful): Wrap the outside of the springform pan with two layers of foil. Place it in a larger roasting pan. Pour boiling water into the roasting pan to reach halfway up the sides of the springform. This helps prevent cracks.
- Fill and bake: Pour the filling over the crust and smooth the top. Bake at 300°F for 55–70 minutes, until the edges are set and the center wobbles slightly like Jell-O when nudged. Do not overbake.
- Cool gradually: Turn off the oven and crack the door for 1 hour. Remove the cheesecake, then cool at room temperature another hour. Run a thin knife around the edge to release it from the pan.
- Chill to set: Cover and refrigerate at least 6 hours, preferably overnight, until fully firm.
- Make the strawberry topping: In a small saucepan, combine sliced strawberries, allulose, and lemon juice. Cook over medium heat for 5–7 minutes, stirring, until the berries release juices and soften. For a thicker sauce, sprinkle xanthan gum lightly over the surface and whisk in quickly. Simmer 1 minute more, then cool completely.
- Assemble and serve: Remove the cheesecake ring. Spoon cooled strawberry topping over the cheesecake. Garnish with fresh berries and dollops of whipped cream. Slice with a hot, clean knife for neat edges.
What Makes This Special

This cheesecake doesn’t rely on complicated tricks or strange ingredients. It uses everyday keto staples and turns them into something that feels indulgent and bakery-worthy.
The sweetener blends in cleanly without a cooling aftertaste, the crust stays crisp, and the strawberry topping tastes like summer. Best of all, it sets beautifully and slices clean, so you get neat wedges every time.
Shopping List
- For the crust:
- 2 cups super-fine almond flour
- 1/4 cup powdered erythritol or allulose (or a blend)
- 1/4 teaspoon fine sea salt
- 6 tablespoons unsalted butter, melted
- 1 teaspoon vanilla extract
- For the filling:
- 24 ounces cream cheese, softened to room temperature
- 3/4 cup powdered erythritol or allulose (or a blend)
- 3 large eggs, room temperature
- 1/2 cup sour cream
- 1 teaspoon lemon zest
- 2 teaspoons vanilla extract
- Pinch of salt
- For the strawberry topping:
- 2 cups fresh strawberries, hulled and sliced
- 3 tablespoons allulose (preferred for better syrup texture)
- 1 teaspoon lemon juice
- 1/4 teaspoon xanthan gum (optional, for thicker sauce)
- To finish:
- Extra fresh strawberries for garnish
- Whipped cream (unsweetened or lightly sweetened with keto sweetener)
Instructions
- Prep the pan and oven: Heat the oven to 325°F (163°C). Line the bottom of a 9-inch springform pan with parchment.
Lightly grease the sides to prevent sticking.
- Make the crust: In a bowl, mix almond flour, powdered sweetener, and salt. Stir in melted butter and vanilla until the mixture looks like damp sand. Press evenly into the pan, pushing slightly up the sides.
- Par-bake the crust: Bake for 10–12 minutes until set and lightly golden.
Set aside to cool while you make the filling. Lower oven to 300°F (149°C) for the cheesecake.
- Beat the cream cheese: With a stand mixer or hand mixer on medium-low, beat cream cheese until completely smooth and lump-free. Scrape the bowl well.
This step is key to a silky texture.
- Add sweetener and flavor: Add powdered sweetener, lemon zest, vanilla, and salt. Beat on low until fully blended. Avoid whipping in too much air.
- Mix in eggs and sour cream: Beat in eggs one at a time on low, just until combined.
Add sour cream and mix on low until smooth. Scrape the bowl and mix 5–10 seconds more.
- Set up a water bath (optional but helpful): Wrap the outside of the springform pan with two layers of foil. Place it in a larger roasting pan.
Pour boiling water into the roasting pan to reach halfway up the sides of the springform. This helps prevent cracks.
- Fill and bake: Pour the filling over the crust and smooth the top. Bake at 300°F for 55–70 minutes, until the edges are set and the center wobbles slightly like Jell-O when nudged.
Do not overbake.
- Cool gradually: Turn off the oven and crack the door for 1 hour. Remove the cheesecake, then cool at room temperature another hour. Run a thin knife around the edge to release it from the pan.
- Chill to set: Cover and refrigerate at least 6 hours, preferably overnight, until fully firm.
- Make the strawberry topping: In a small saucepan, combine sliced strawberries, allulose, and lemon juice.
Cook over medium heat for 5–7 minutes, stirring, until the berries release juices and soften. For a thicker sauce, sprinkle xanthan gum lightly over the surface and whisk in quickly. Simmer 1 minute more, then cool completely.
- Assemble and serve: Remove the cheesecake ring.
Spoon cooled strawberry topping over the cheesecake. Garnish with fresh berries and dollops of whipped cream. Slice with a hot, clean knife for neat edges.
Storage Instructions
- Refrigerator: Store covered for up to 5 days.
Keep the strawberry topping separate if you want the top to stay glossy and firm.
- Freezer: Freeze slices without topping, tightly wrapped, for up to 2 months. Thaw overnight in the fridge and add fresh topping before serving.
- Make-ahead: Bake the cheesecake a day or two before you need it. The flavor actually improves after a full day of chilling.
Benefits of This Recipe
- Keto-friendly and satisfying: High in fat and protein to keep you full, with minimal net carbs.
- Simple ingredients: Uses pantry staples you can find easily, no odd thickeners or specialty mixes required.
- Versatile sweeteners: Works with erythritol, allulose, or blends, so you can match your taste and texture preferences.
- Great texture: The combo of cream cheese and sour cream keeps it creamy without being dense or chalky.
- Make-ahead friendly: Perfect for parties or holidays because it needs chill time and slices beautifully.
Pitfalls to Watch Out For
- Overmixing: Too much air in the batter can cause cracks.
Mix on low and stop when just combined.
- Cold ingredients: Cold cream cheese leads to lumps. Let your dairy come to room temperature before mixing.
- Overbaking: If it’s fully set in the oven, it’s overbaked. Look for a slightly jiggly center.
- Skipping the cool-down: Rapid temperature changes can crack the top.
Use the gradual cool-down steps.
- Wrong sweetener texture: Granulated erythritol can feel gritty in the filling. Use powdered forms for smoothness.
Never Wonder What's For Dinner Again
Save time, eat healthier, and take the stress out of dinner. Get a full week of easy healthy dinners delivered straight to your inbox.
Recipe Variations
- No-bake shortcut: Skip eggs and baking. Whip 24 oz cream cheese with 1 cup powdered sweetener, 1/2 cup sour cream, and 1 teaspoon vanilla.
Fold in 1 cup lightly whipped heavy cream. Chill in a crust until set, then top with strawberries.
- Chocolate swirl: Melt 3 ounces 90% dark chocolate with 2 tablespoons butter. Swirl through the filling before baking for a keto chocolate-strawberry vibe.
- Lemon burst: Add 2 tablespoons lemon juice and extra zest to the filling.
Top with strawberries for a bright, tangy finish.
- Mini cheesecakes: Press crust into lined muffin tins, bake 6–8 minutes. Add filling and bake 15–18 minutes. Great for portion control and faster chilling.
- Nut-free crust: Use finely ground unsweetened shredded coconut plus a tablespoon of coconut flour.
Add an extra tablespoon of butter if needed to hold together.
- Berry swap: Use raspberries or blackberries for a twist. Adjust sweetness to taste; some berries are more tart.
FAQ
Can I use granulated sweetener instead of powdered?
You can for the crust, but for the filling it’s best to use powdered sweetener to avoid a gritty texture. If you only have granulated, blitz it in a blender until powdery.
What sweetener tastes best in cheesecake?
Allulose gives the smoothest texture and no cooling effect, especially in the strawberry topping.
A blend of erythritol and monk fruit also works well in the filling and crust.
Do I have to use a water bath?
No, but it helps prevent cracks and keeps the texture creamy. If you skip it, bake at 300°F, avoid overbaking, and follow the gradual cool-down for good results.
How do I know when it’s done?
Look for set edges and a center that still jiggles slightly when you tap the pan. The surface should look matte, not wet.
It will firm up fully in the fridge.
Can I make this dairy-free?
Try dairy-free cream cheese and a thick coconut yogurt in place of sour cream. Textures vary by brand, so expect a slightly softer set and adjust sweetener to taste.
How many carbs per slice?
Exact macros depend on brands and sweeteners, but a typical slice (1/12 of the cake) is roughly 5–7g net carbs without extra whipped cream. Use a nutrition calculator for your ingredients.
Why did my cheesecake crack?
Common causes are overmixing, sudden temperature changes, or overbaking.
Next time, mix on low, use a water bath if possible, and cool gradually with the oven door slightly open.
Final Thoughts
This Keto Strawberry Cheesecake delivers the classic taste you crave with a smart low-carb twist. With simple ingredients and a few careful steps, you’ll get a smooth, elegant dessert that feels special every time. Keep the tips in mind, let it chill thoroughly, and don’t rush the process.
The first slice will prove it was worth the wait. Enjoy it for birthdays, holidays, or any night that needs a sweet, keto-friendly finish.
Printable Recipe Card
Want just the essential recipe details without scrolling through the article? Get our printable recipe card with just the ingredients and instructions.
Loved This Recipe?
If you're looking for more simple, healthy dinners your family will actually eat, grab my FREE 7-Day Easy Dinner Reset. You'll get 7 easy dinner recipes, simple grocery lists, and a done-for-you plan that takes the stress out of mealtime.