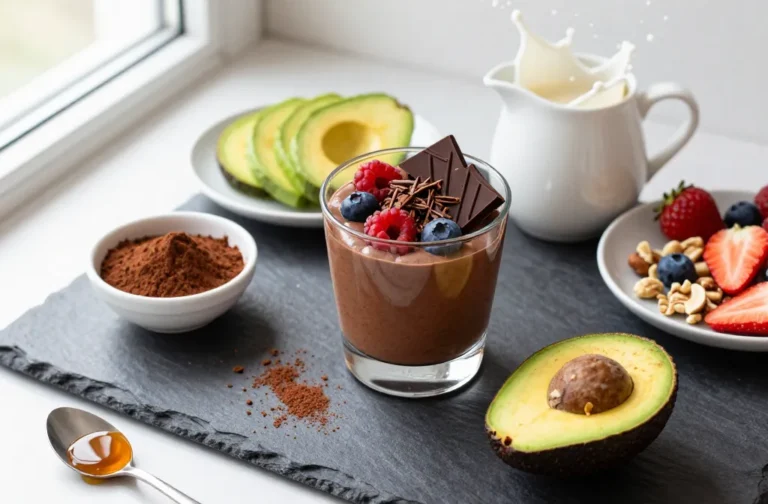
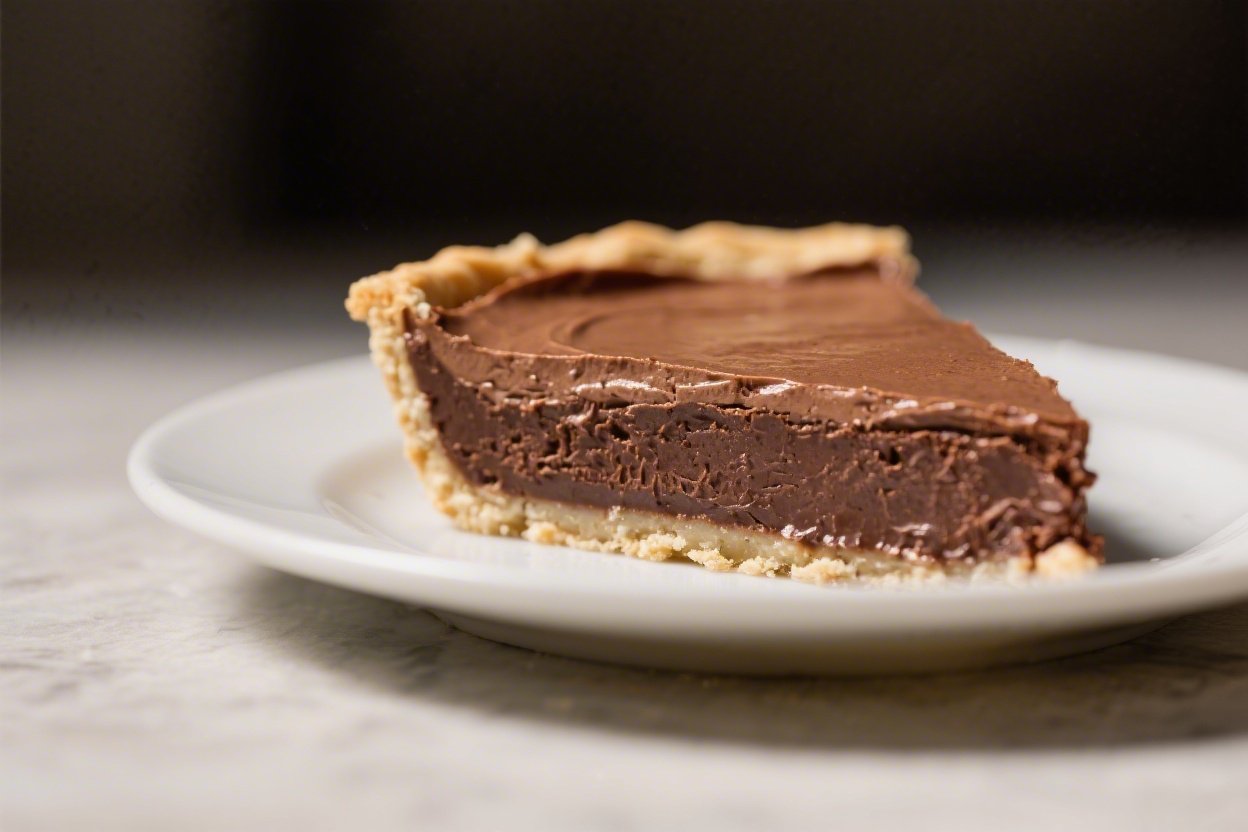
Low-Carb Chocolate Cream Pie – Rich, Silky, and Surprisingly Light
If you crave a classic chocolate cream pie but want to keep your carbs in check, this recipe hits that sweet spot. It’s lush, silky, and full of real chocolate flavor without the sugar crash. The crust is nutty and crisp, the filling is velvety, and the whipped topping adds an airy finish.
It’s the kind of dessert that feels special but won’t throw off your goals. Make it for a gathering or a quiet night in—you won’t miss the traditional version.
Ingredients
Method
- Heat the oven and prep the pan. Set the oven to 350°F (175°C). Lightly grease a 9-inch pie dish.
- Make the crust. In a bowl, mix almond flour, cocoa, granulated sweetener, and salt. Stir in melted butter and vanilla until the mixture resembles damp sand and clumps when pressed.
- Press and bake. Press the mixture evenly into the bottom and up the sides of the pie dish. Dock the base with a fork. Bake for 10–12 minutes until set and fragrant. Cool completely.
- Bloom the gelatin. Sprinkle gelatin over 2 tablespoons cold water in a small bowl. Let sit 5 minutes to soften.
- Start the custard base. In a medium saucepan, whisk heavy cream, almond milk, powdered sweetener, salt, and cocoa powder. Warm over medium heat until steaming, not boiling.
- Melt in the chocolate. Add chopped unsweetened chocolate and whisk until smooth and glossy.
- Temper the yolks. In a separate bowl, whisk egg yolks. Slowly drizzle in 1/2 cup of the hot chocolate mixture, whisking constantly. Pour the tempered yolks back into the saucepan.
- Thicken gently. Cook over low heat, stirring constantly with a spatula, until the mixture thickens slightly and coats the back of the spoon (about 170–175°F). Do not boil.
- Add gelatin and finish. Remove from heat. Stir in the bloomed gelatin until fully dissolved. Whisk in butter and vanilla until silky.
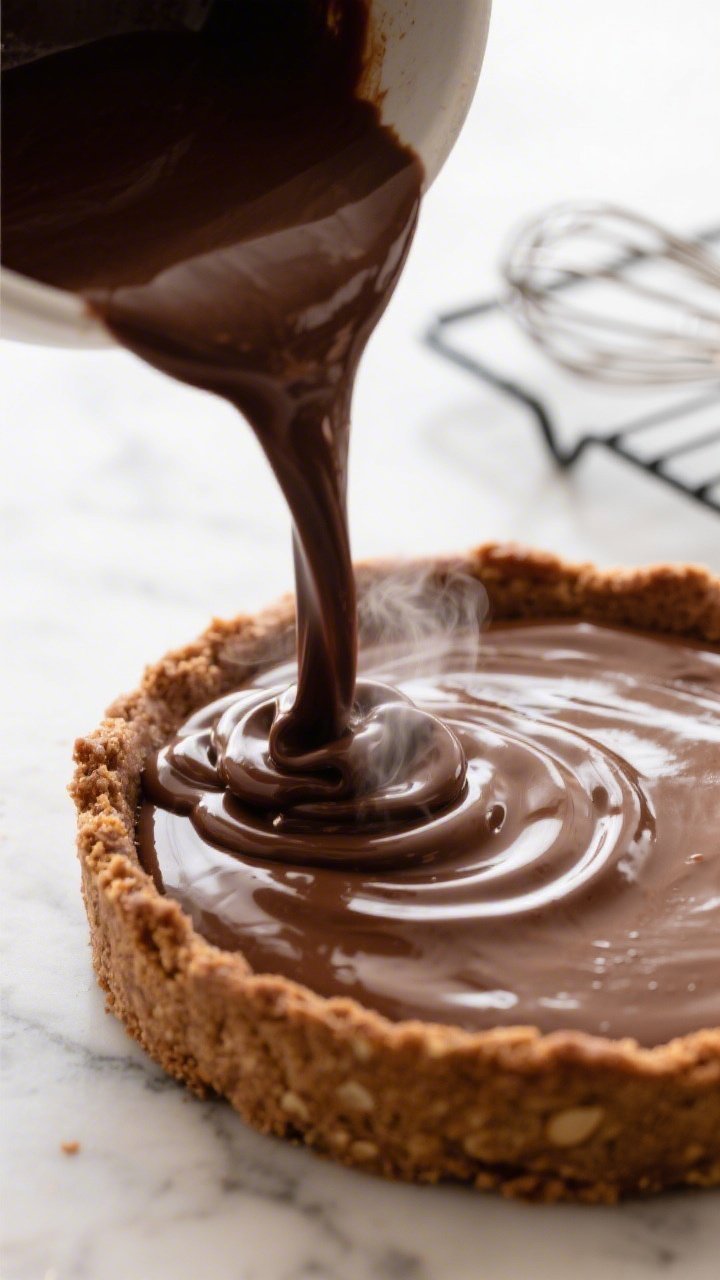
- Cool and pour. Let the filling cool for 10–15 minutes, stirring occasionally to prevent a skin. Pour into the cooled crust and smooth the top.
- Chill to set. Cover loosely and refrigerate at least 4 hours, preferably overnight, until firm.
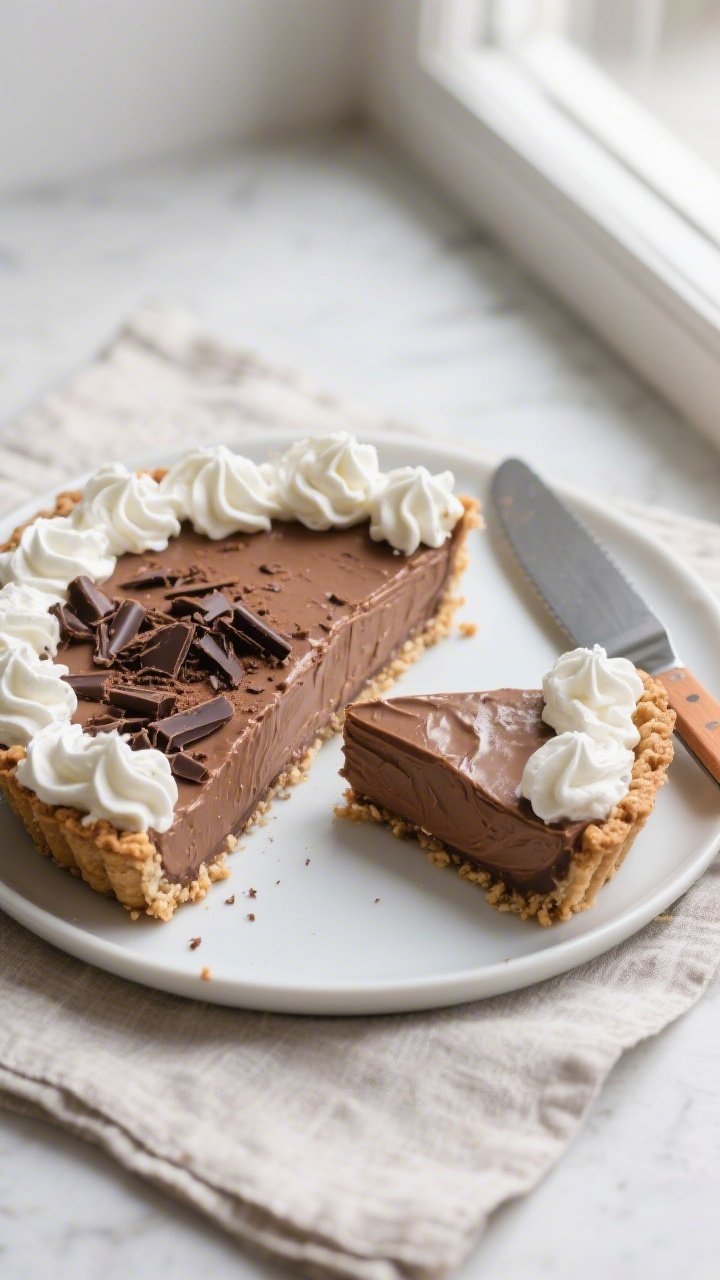
- Whip the topping. Beat heavy cream, powdered sweetener, and vanilla to soft peaks. Spread or pipe over the chilled pie. Add chocolate shavings if you like.
- Slice and serve. Use a sharp knife warmed under hot water and wiped dry for clean slices.

What Makes This Special
This pie brings together simple, whole-food ingredients with smart swaps to keep it low carb. The crust uses almond flour and butter for a toasty base that holds up well.
The filling uses unsweetened chocolate and a low-carb sweetener for deep flavor and less sugar. Best of all, the texture is classic: smooth, sliceable, and satisfying. It looks and tastes like a bakery treat, but it’s easy enough for a weeknight project.
What You’ll Need
- For the crust:
- 1 1/2 cups fine almond flour
- 3 tablespoons cocoa powder (unsweetened)
- 3 tablespoons granulated erythritol or allulose (or a blend)
- 1/4 teaspoon fine sea salt
- 1/4 cup unsalted butter, melted
- 1 teaspoon vanilla extract
- For the chocolate filling:
- 1 cup heavy cream
- 1 cup unsweetened almond milk (or another low-carb milk)
- 5 ounces unsweetened baking chocolate, chopped
- 2/3 cup powdered erythritol or allulose (to taste)
- 1/4 teaspoon fine sea salt
- 3 large egg yolks
- 2 tablespoons cocoa powder (unsweetened)
- 2 tablespoons unsalted butter
- 1 teaspoon pure vanilla extract
- 1 1/2 teaspoons unflavored gelatin (or 1 tablespoon arrowroot if not strict low-carb; see FAQ)
- 2 tablespoons cold water (for blooming gelatin)
- For the whipped topping:
- 3/4 cup heavy cream
- 2 tablespoons powdered low-carb sweetener
- 1/2 teaspoon vanilla extract
- Optional: dark chocolate shavings (90%+ cacao) for garnish
Instructions
- Heat the oven and prep the pan. Set the oven to 350°F (175°C).
Lightly grease a 9-inch pie dish.
- Make the crust. In a bowl, mix almond flour, cocoa, granulated sweetener, and salt. Stir in melted butter and vanilla until the mixture resembles damp sand and clumps when pressed.
- Press and bake. Press the mixture evenly into the bottom and up the sides of the pie dish. Dock the base with a fork.
Bake for 10–12 minutes until set and fragrant. Cool completely.
- Bloom the gelatin. Sprinkle gelatin over 2 tablespoons cold water in a small bowl. Let sit 5 minutes to soften.
- Start the custard base. In a medium saucepan, whisk heavy cream, almond milk, powdered sweetener, salt, and cocoa powder.
Warm over medium heat until steaming, not boiling.
- Melt in the chocolate. Add chopped unsweetened chocolate and whisk until smooth and glossy.
- Temper the yolks. In a separate bowl, whisk egg yolks. Slowly drizzle in 1/2 cup of the hot chocolate mixture, whisking constantly. Pour the tempered yolks back into the saucepan.
- Thicken gently. Cook over low heat, stirring constantly with a spatula, until the mixture thickens slightly and coats the back of the spoon (about 170–175°F).
Do not boil.
- Add gelatin and finish. Remove from heat. Stir in the bloomed gelatin until fully dissolved. Whisk in butter and vanilla until silky.
- Cool and pour. Let the filling cool for 10–15 minutes, stirring occasionally to prevent a skin.
Pour into the cooled crust and smooth the top.
- Chill to set. Cover loosely and refrigerate at least 4 hours, preferably overnight, until firm.
- Whip the topping. Beat heavy cream, powdered sweetener, and vanilla to soft peaks. Spread or pipe over the chilled pie. Add chocolate shavings if you like.
- Slice and serve. Use a sharp knife warmed under hot water and wiped dry for clean slices.
Storage Instructions
- Refrigerate: Cover and store in the fridge for up to 4 days.
The crust stays crisp best within the first 48 hours.
- Freeze: For longer storage, freeze slices on a tray until firm, then wrap and keep up to 1 month. Thaw overnight in the fridge.
- Prevent weeping: If your fridge is very humid, add a loose tent of foil to reduce condensation on the whipped topping.
Benefits of This Recipe
- Low in sugar and carbs: Uses low-carb sweeteners and almond flour, so you get dessert without the sugar spike.
- High in satisfaction: The fat content from cream, butter, and nuts makes each slice filling and keeps cravings at bay.
- Gluten-free friendly: The crust is naturally gluten-free.
- Customizable: Easy to adapt sweetness, chocolate intensity, and toppings.
What Not to Do
- Don’t boil the custard. Boiling can scramble the yolks and make the texture grainy.
- Don’t skip blooming the gelatin. Undissolved gelatin causes lumps and prevents a clean set.
- Don’t use sweetened chocolate. It will raise the carb count and throw off the sweetness balance.
- Don’t rush the chill time. The filling needs several hours to set properly.
- Don’t overbake the crust. Almond flour burns quickly; pull it when fragrant and just set.
Variations You Can Try
- Mocha Cream Pie: Add 1–2 teaspoons instant espresso to the custard with the cocoa powder.
- Salted Chocolate: Finish with a light sprinkle of flaky sea salt on the whipped cream.
- Peanut Butter Swirl: Warm 1/3 cup natural peanut butter with a bit of almond milk and swirl into the filling before chilling.
- Coconut Cream Topping: Swap whipped cream for whipped coconut cream if you avoid dairy (keep in mind this changes carb and fat profiles slightly).
- Chocolate-Mint: Replace vanilla in the filling with 1/2 teaspoon peppermint extract and garnish with crushed, no-sugar peppermint pieces.
- Hazelnut Crust: Use hazelnut flour for a Nutella-like vibe.
FAQ
Can I make this pie completely dairy-free?
Yes, with adjustments. Use full-fat coconut milk or coconut cream for the custard, coconut oil instead of butter in the crust and filling, and whipped coconut cream on top.
Flavor and set will be slightly different, but still rich and smooth.
Which sweetener works best?
Allulose blends very smoothly and won’t crystallize in the fridge, giving the cleanest texture. Powdered erythritol works, but may become a bit gritty as it chills. A 50/50 blend of allulose and erythritol is a good middle ground.
Adjust to taste.
Do I have to use gelatin?
Gelatin ensures a clean slice while keeping carbs low. If you don’t use gelatin, you can try 1 tablespoon arrowroot or 1 1/2 teaspoons cornstarch whisked into the yolks, but that adds a small amount of carbs and yields a softer set. Chill thoroughly for best results.
What kind of chocolate should I buy?
Use unsweetened baking chocolate (100% cacao) or a very dark bar (90–100%) and sweeten to taste.
Avoid chocolate chips with added sugar or stabilizers. A good brand with a smooth melt makes a noticeable difference.
Why did my filling turn grainy?
It likely overheated or boiled after adding the yolks. Next time, keep the heat low and stir constantly.
If it’s only slightly grainy, you can blend the warm filling with an immersion blender and strain before chilling.
How do I prevent the crust from getting soggy?
Cool the crust completely before adding the filling, and consider brushing it with a thin layer of melted chocolate to create a moisture barrier. Also, avoid letting the pie sit at room temperature too long before serving.
Can I make it ahead?
Absolutely. The pie sets best when made the day before.
Add the whipped topping within a few hours of serving to keep it fluffy and fresh.
How many carbs are in a slice?
It varies by ingredients and sweetener. A typical slice (1/10 of the pie) made with almond flour, allulose, and unsweetened chocolate lands around 5–7g net carbs. Calculate based on your exact products.
Can I use a different pan size?
A 9-inch pie dish is ideal.
An 8-inch will give a thicker filling layer and may need more chill time. A tart pan with a removable bottom also works; keep an eye on the crust when baking.
Is this keto-friendly?
Yes, as written with low-carb sweeteners and almond flour. Keep portions reasonable and toppings simple to stay within your daily macros.
In Conclusion
This Low-Carb Chocolate Cream Pie gives you everything you love about the classic dessert—deep chocolate flavor, creamy texture, and a crisp crust—without the sugar overload.
It’s simple to make, easy to customize, and great for sharing. Keep this recipe in your back pocket for holidays, potlucks, or any night you want a treat that fits your goals. One slice, and you’ll see why it becomes a regular in the rotation.
Printable Recipe Card
Want just the essential recipe details without scrolling through the article? Get our printable recipe card with just the ingredients and instructions.